Reports are the core feature of Dreambase, they are interactive dashboard layouts with data aggregates, summarization, and insights by Dreambase agents querying your Supabase database.
Prerequisite: Projects
IMPORTANT: All the critical context for generating unique reports are housed in the parent project, which allows unlimited report and chat generation for a singular goal.
View the "Creating Projects" guide first!
—
Step 1: Create a new Project for a new Report topic
THIS IS CRITICAL for a good report. When you create a project, we generate the AI context specific to THAT SPECIFIC TOPIC.
So if you try to create an entirely different report within an existing project, you'll find you swim upstream since our Analyst Agents are using your project context as their priority guidelines.
Step 1 Tip: Be specific in your title and very descriptive in your details
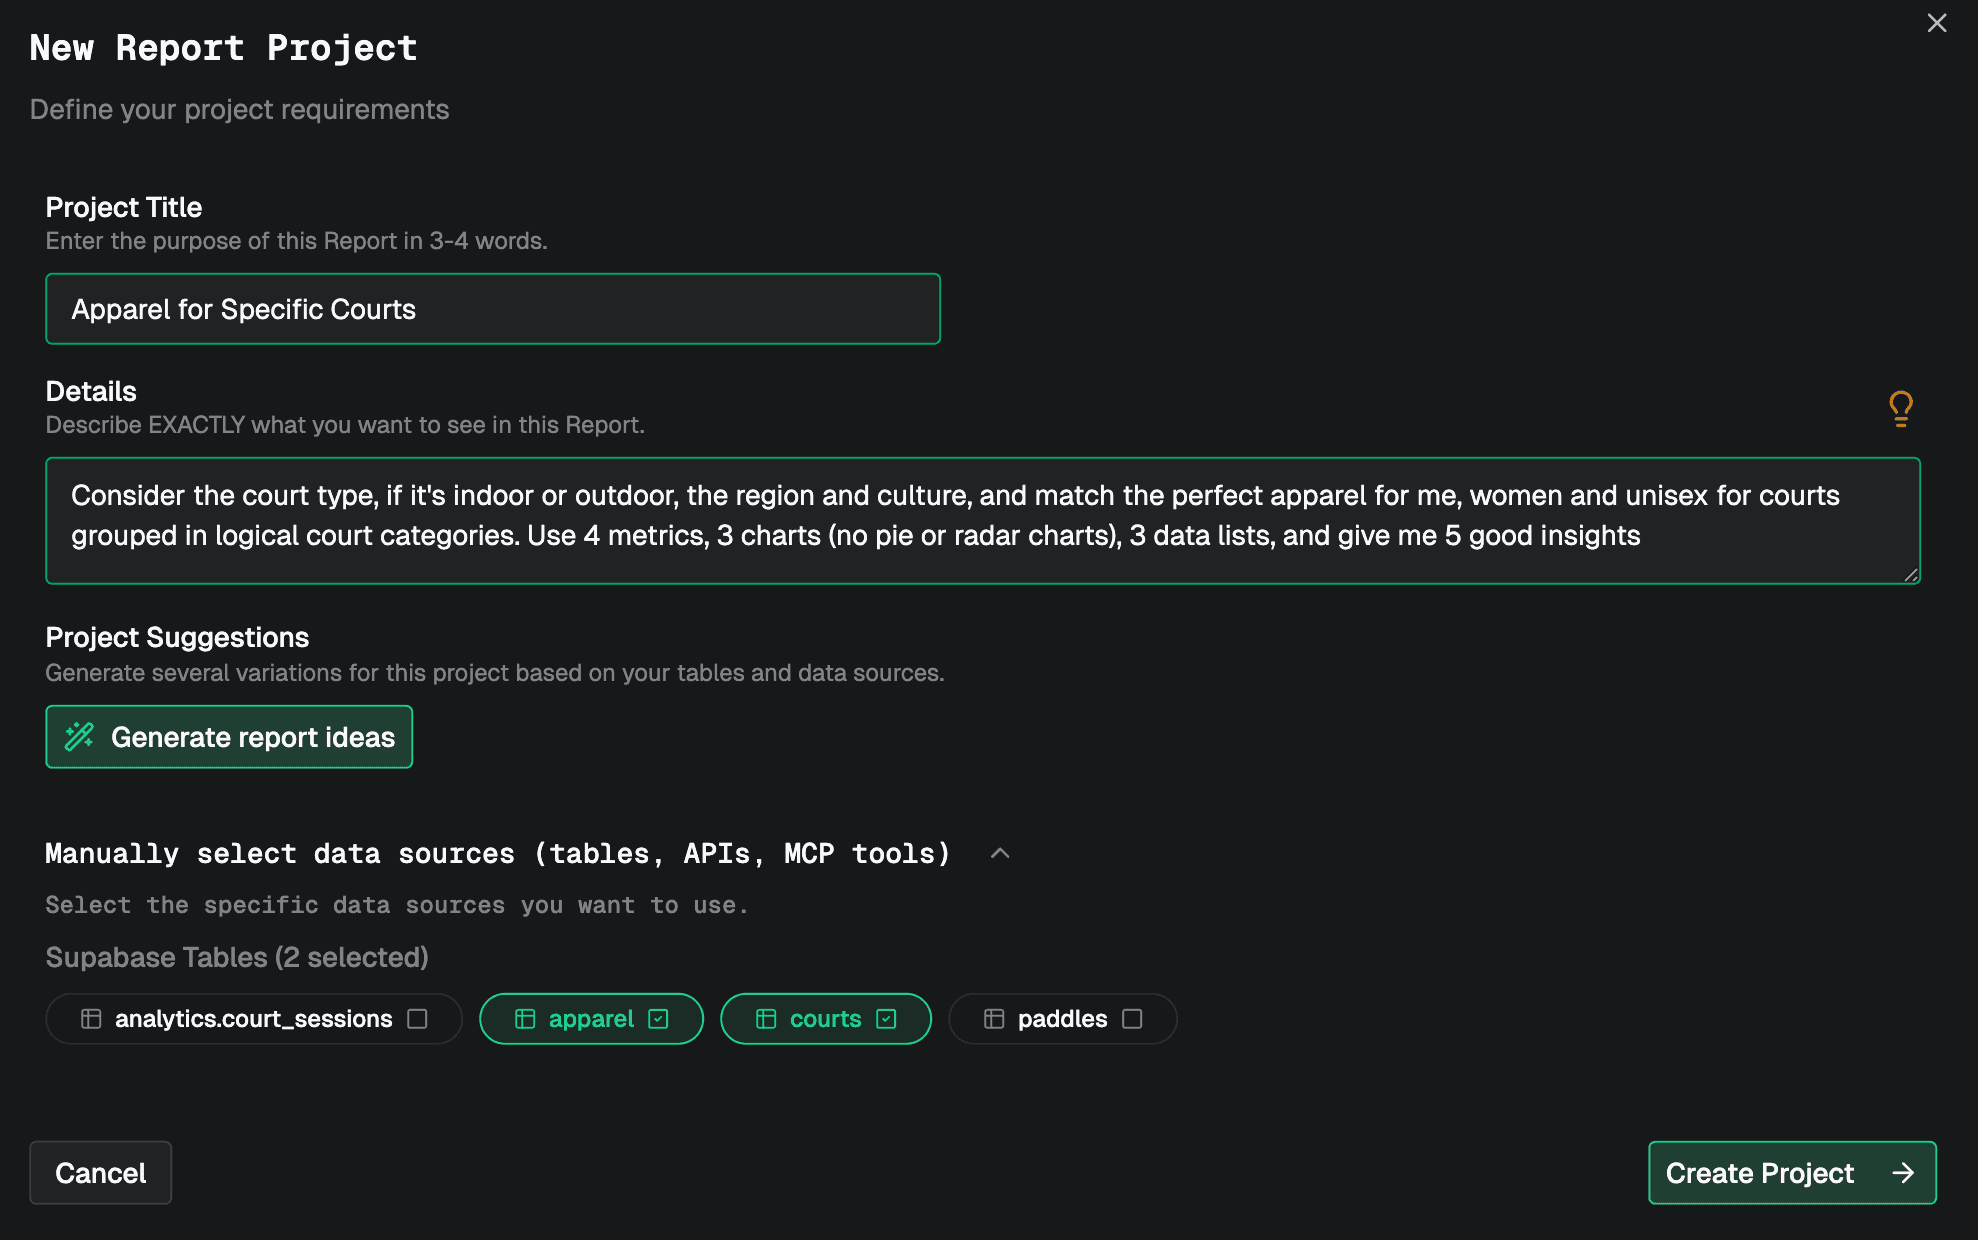
ProTip: Describe complex joins and the exact details of the report you want like this prompt:
"Consider the court type, if it's indoor or outdoor, the region and culture, and match the perfect apparel for me, women and unisex for courts grouped in logical court categories. Use 4 metrics, 3 charts (no pie or radar charts), 3 data lists, and give me 5 good insights"
If you have a lot of tables and you're unsure, use the "Generate report ideas" helper, but make sure you review the tables you want to use. Our agents will ALWAYS try to use them!
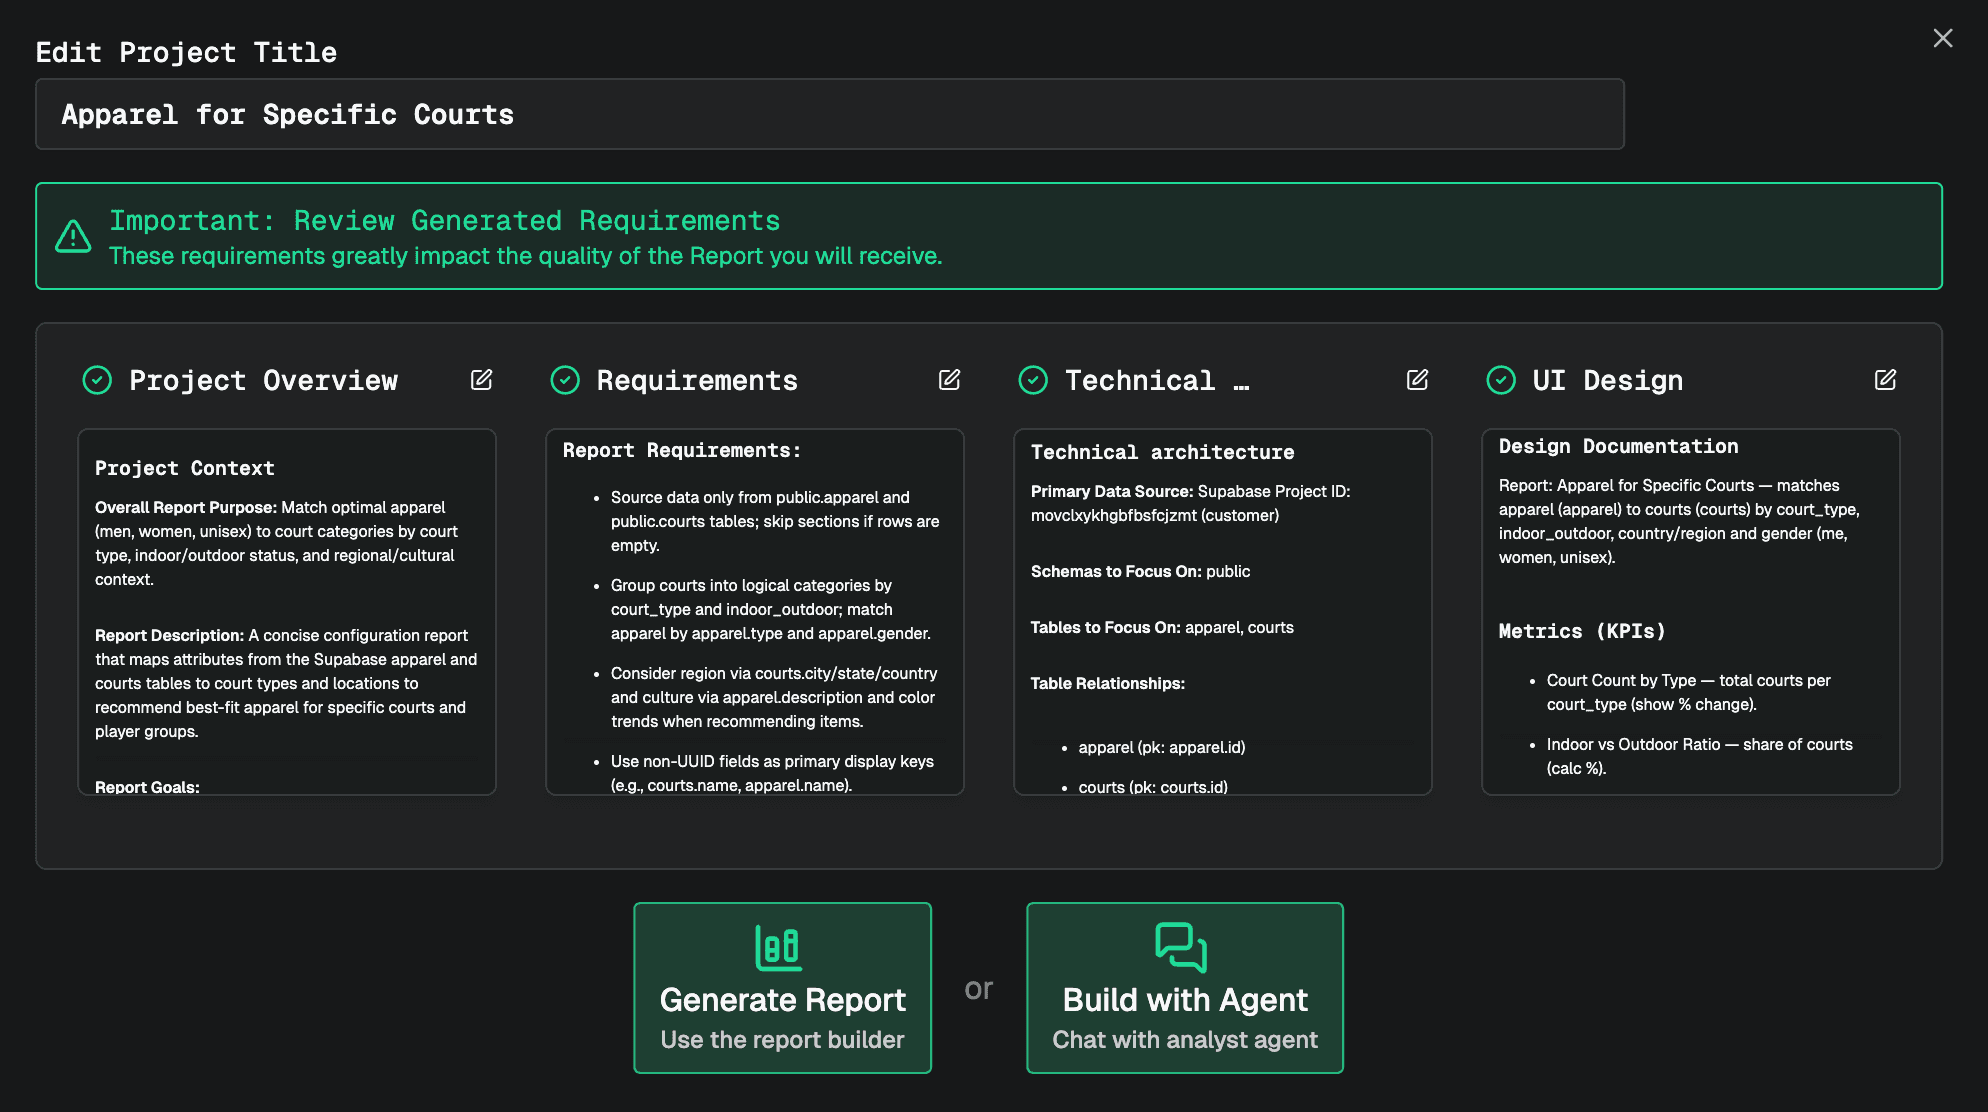
Step 2: Review the Critical Context
Remember, our agents will use this information every single time a report is created in this project, so you must review and edit the context if it's not exactly what you want. We include shortcuts everywhere to edit the context for your convenience.
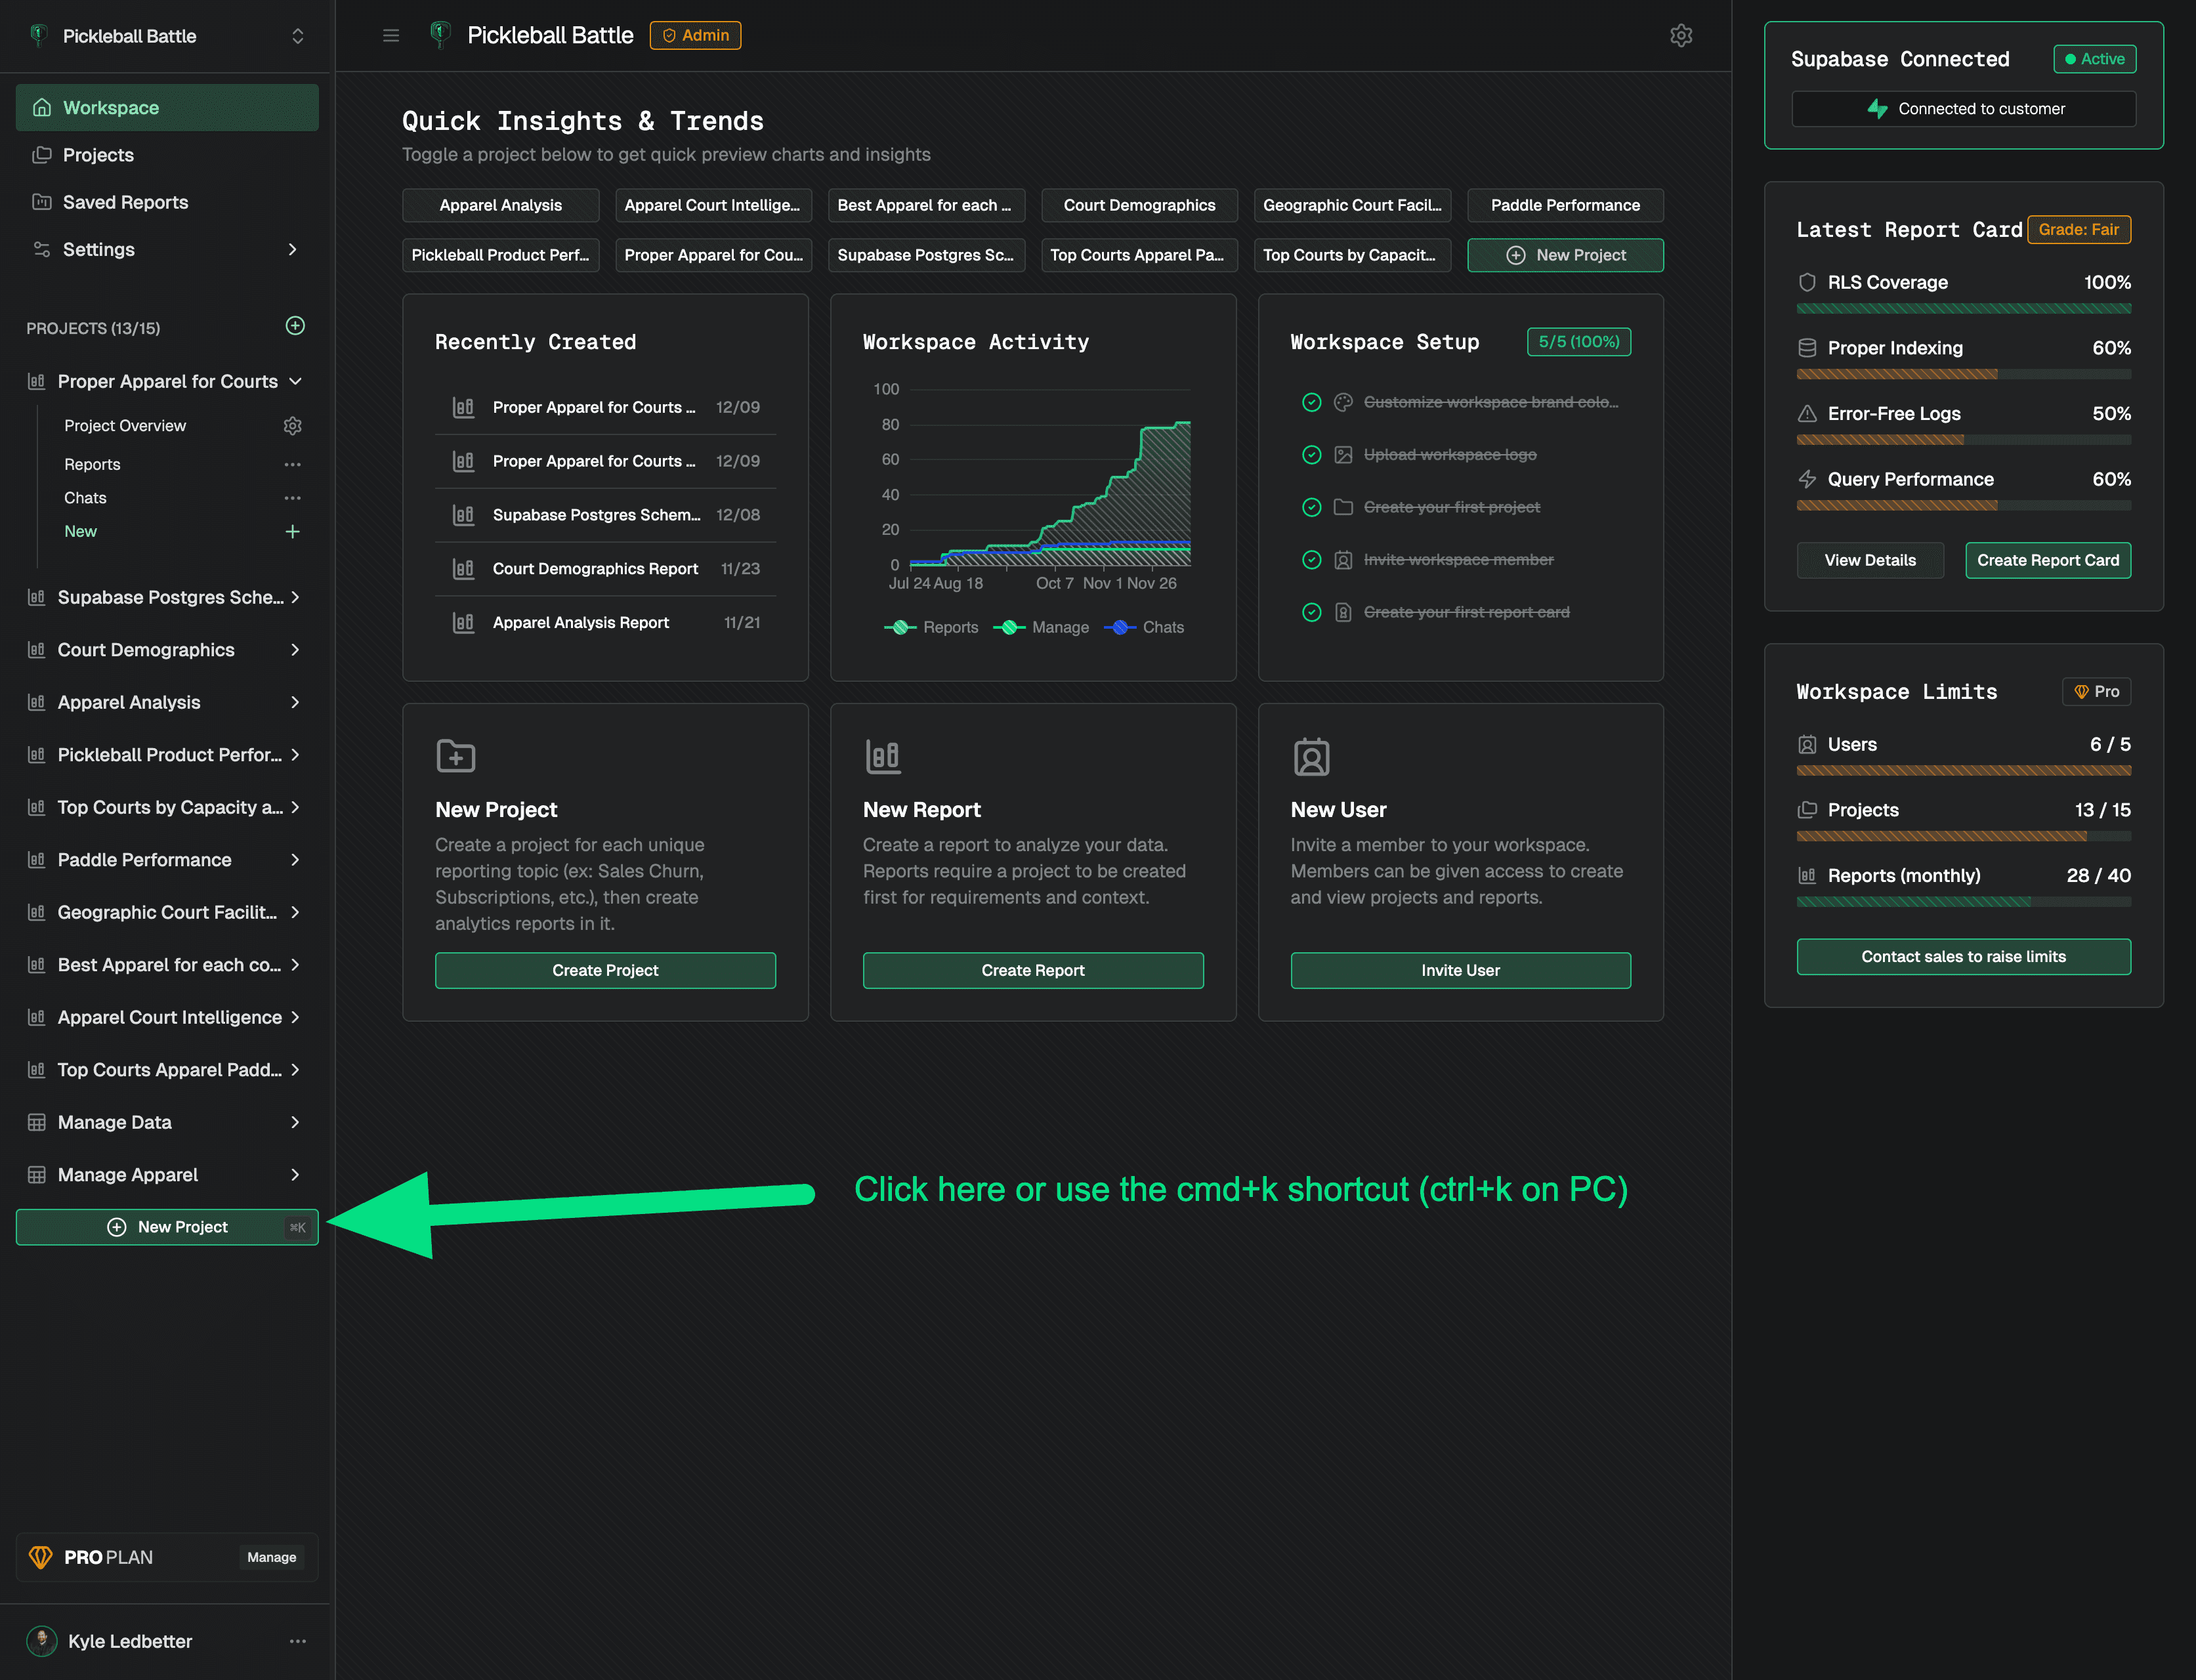
Once you've generated a project (which is streamlined for report generation), click "New" under the project in the left nav or click the + button in the project card grid.
When creating a report you have two options:
A) Generate Report: Use this option if you want a quick report with quick revisions

B) Build with Agent: Use this option if you'd like to build the report with an assistant where you can ask questions and have a conversation about the edits and data.
Step 3: Generate Report
A report-centric streaming process where our agents work in the background to build the report to your specifications in your Project Context and prompt.
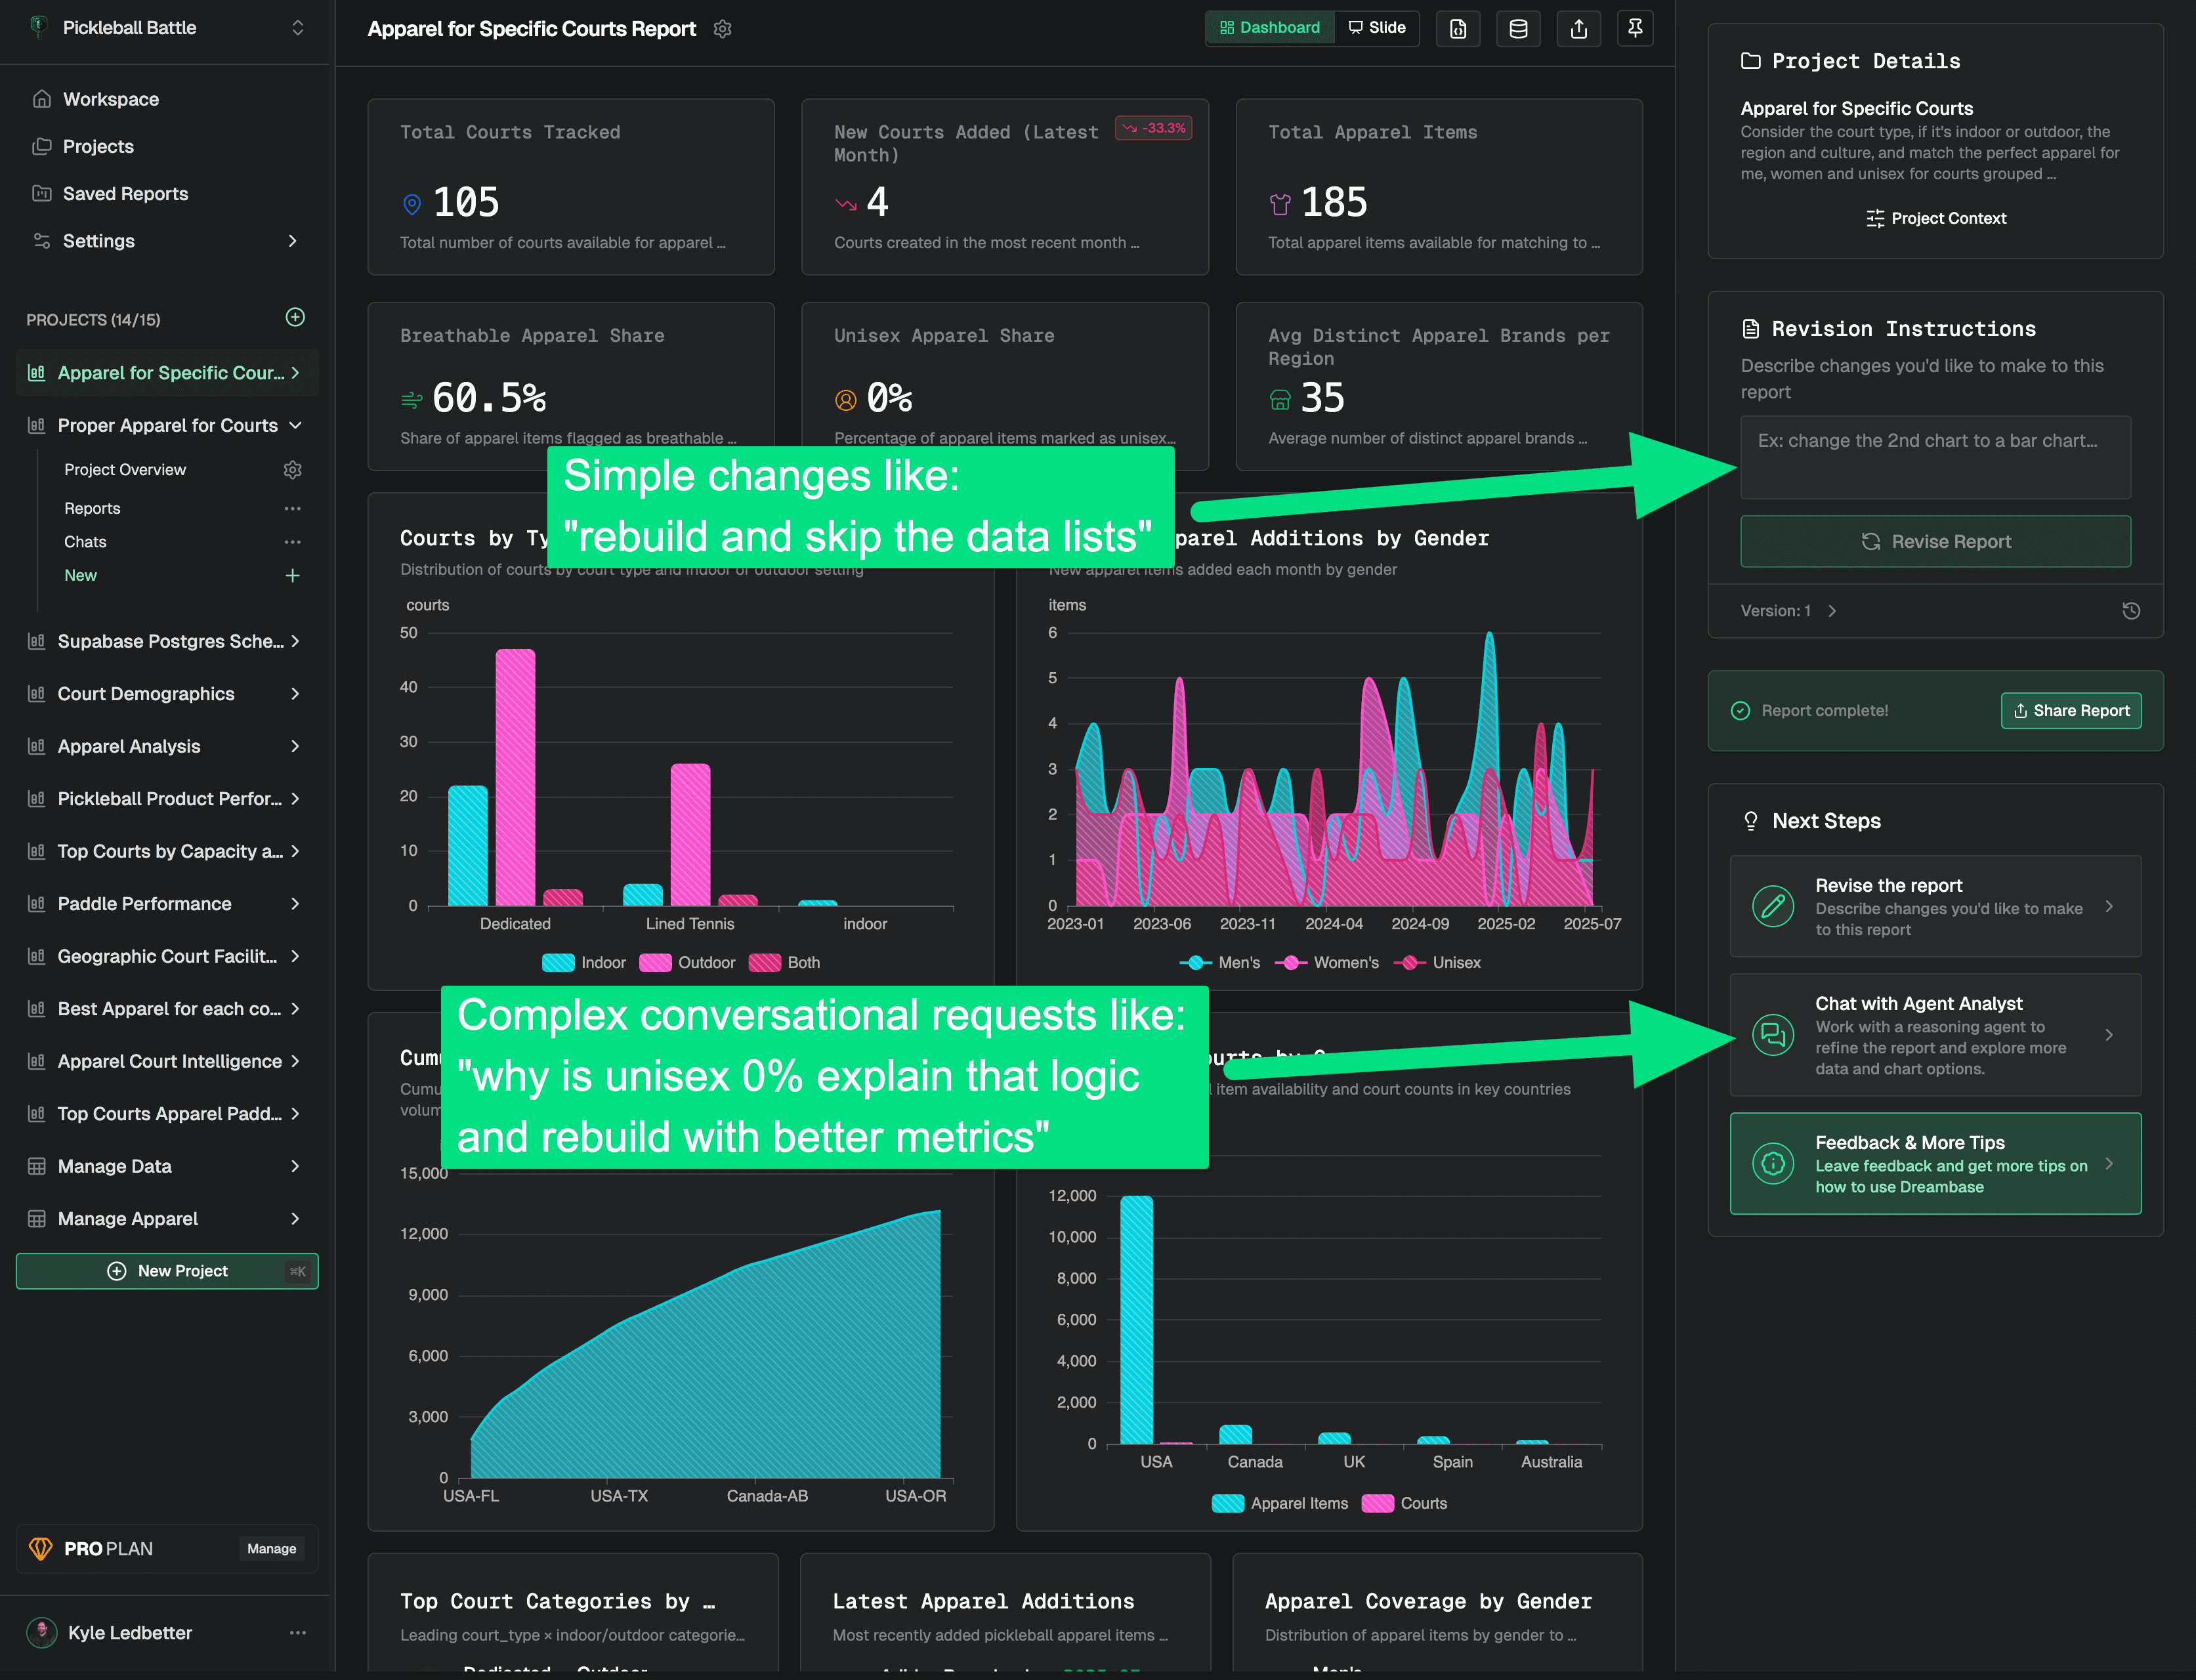
Step 3 Tip: Use the Agent Chat for more complex revisions
After a report has successfully been built, you can continue to give SIMPLE revisions to revise the report like "rebuild and skip the data lists". If you have questions, need help understanding the data, or want more complex changes or you can transition to a chat session to work with the Analyst Agent, or create an entirely new report project.
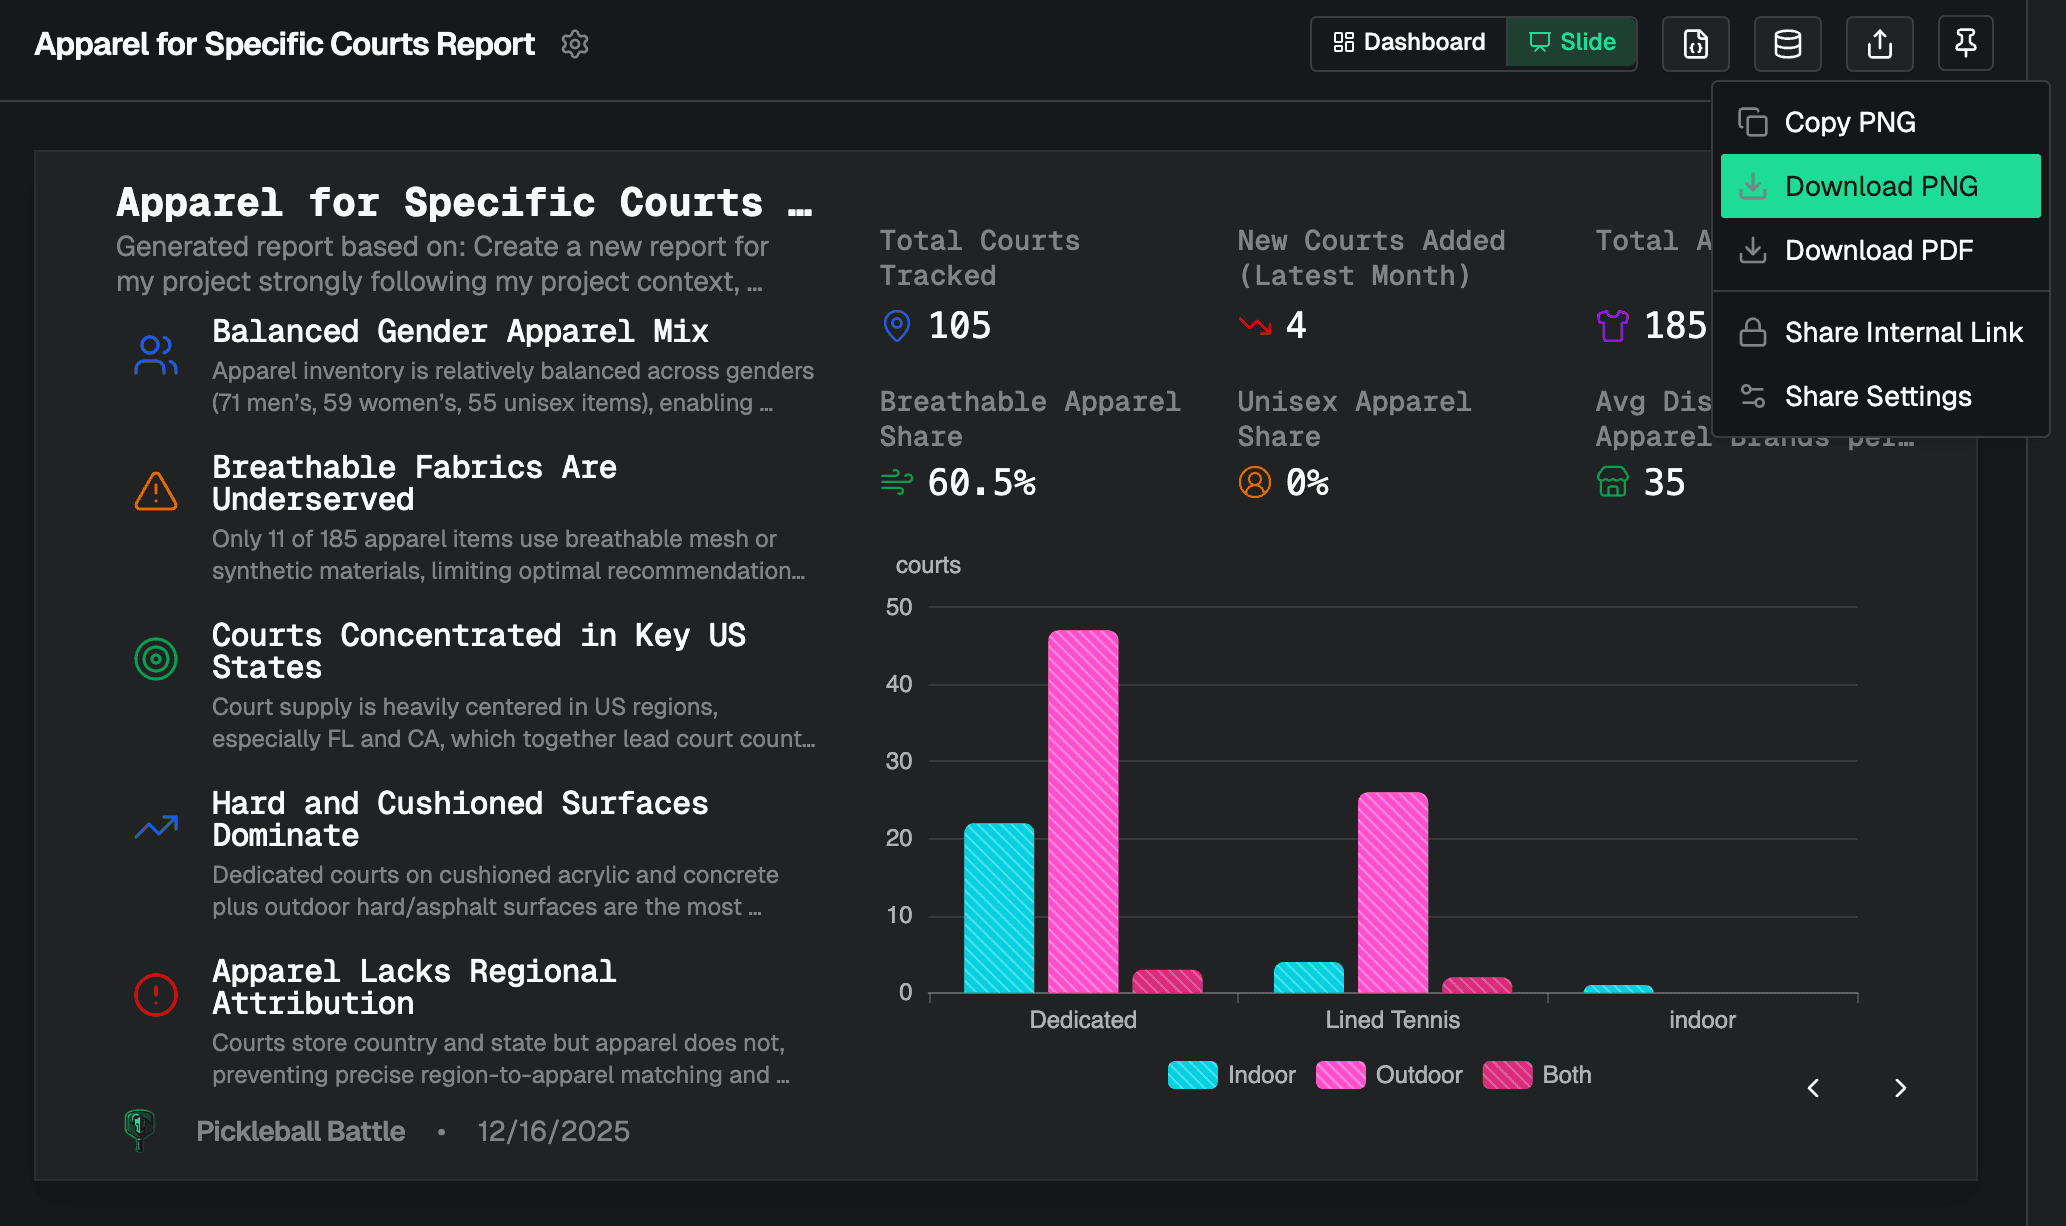
Try the Slide layout, perfect for sharing in email, slack, and copying into presentations!
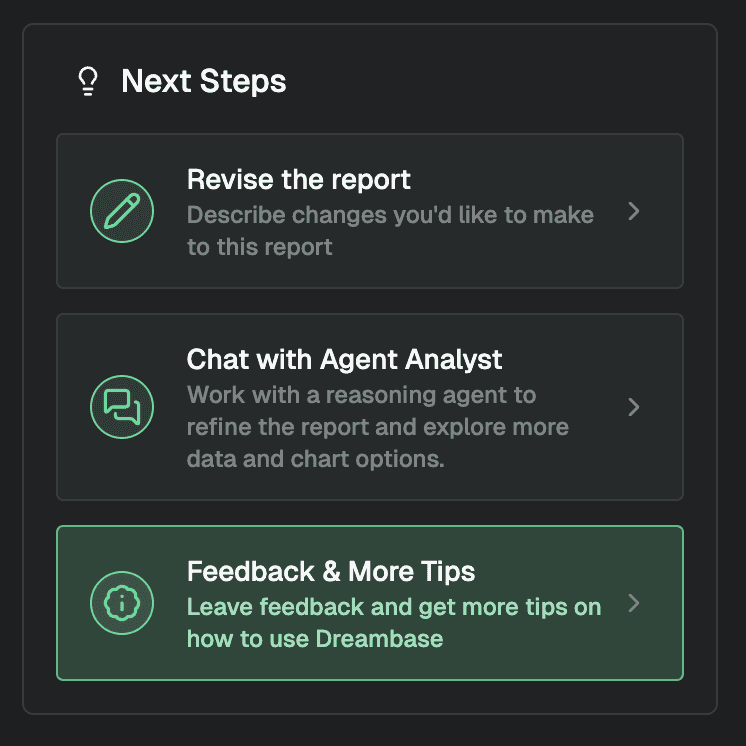
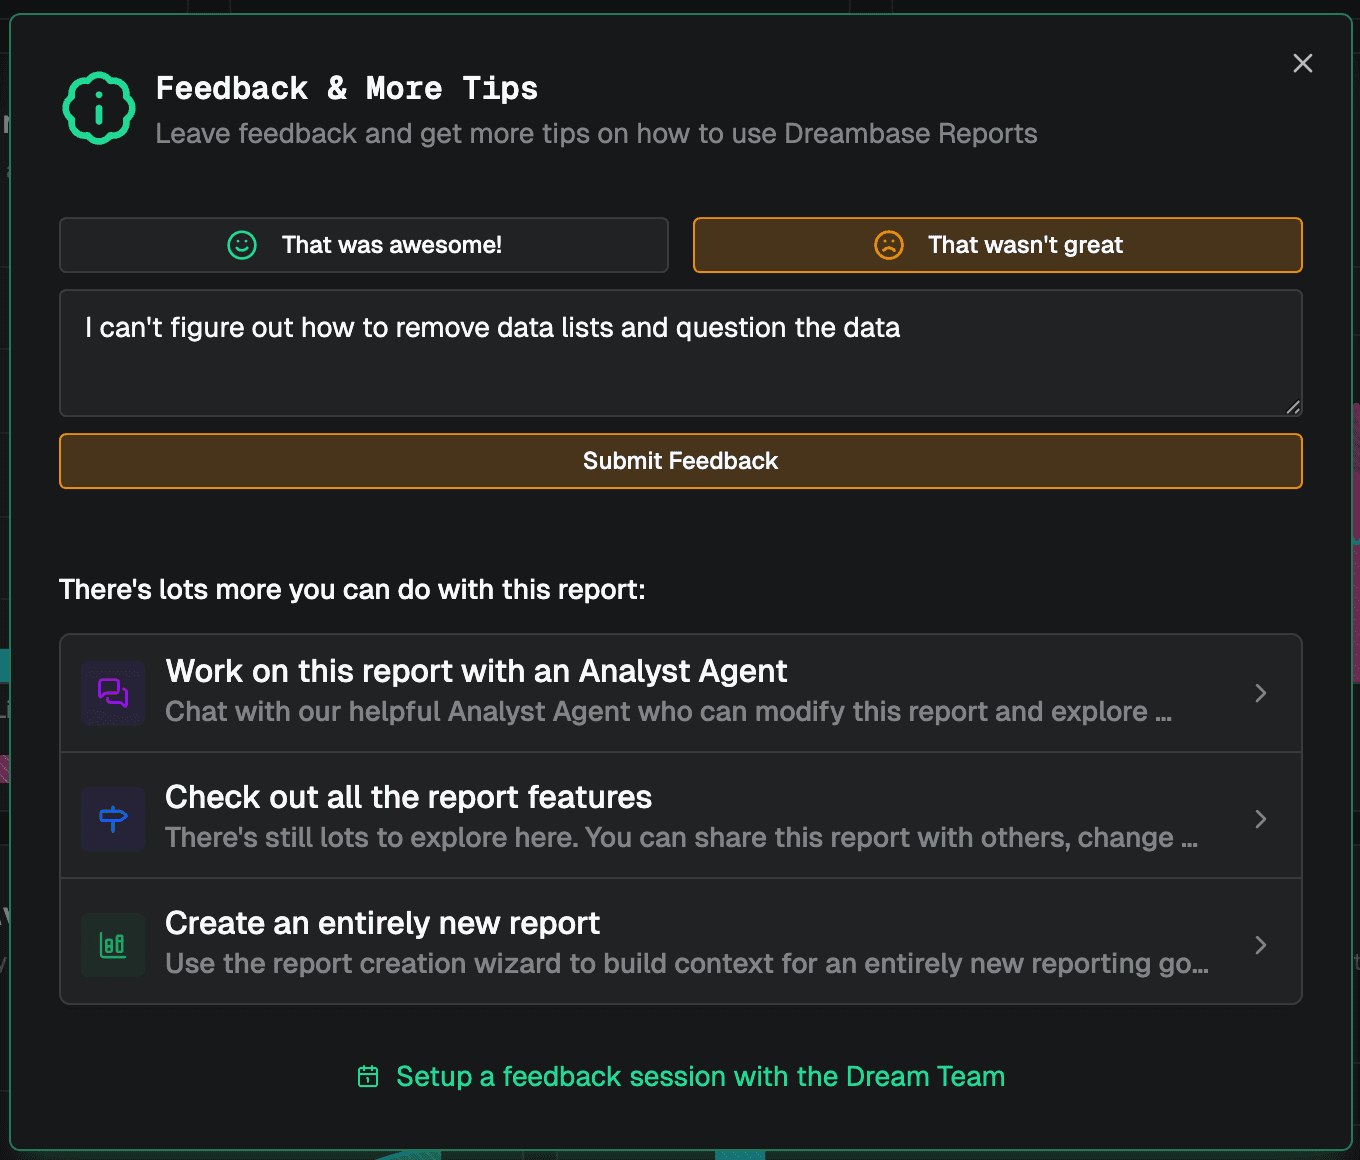
Step 3 Tip: Leave feedback for a report
We've added the ability to leave detailed feedback so we can help improve your report experience!
Step 4: Chat with Agent Analyst
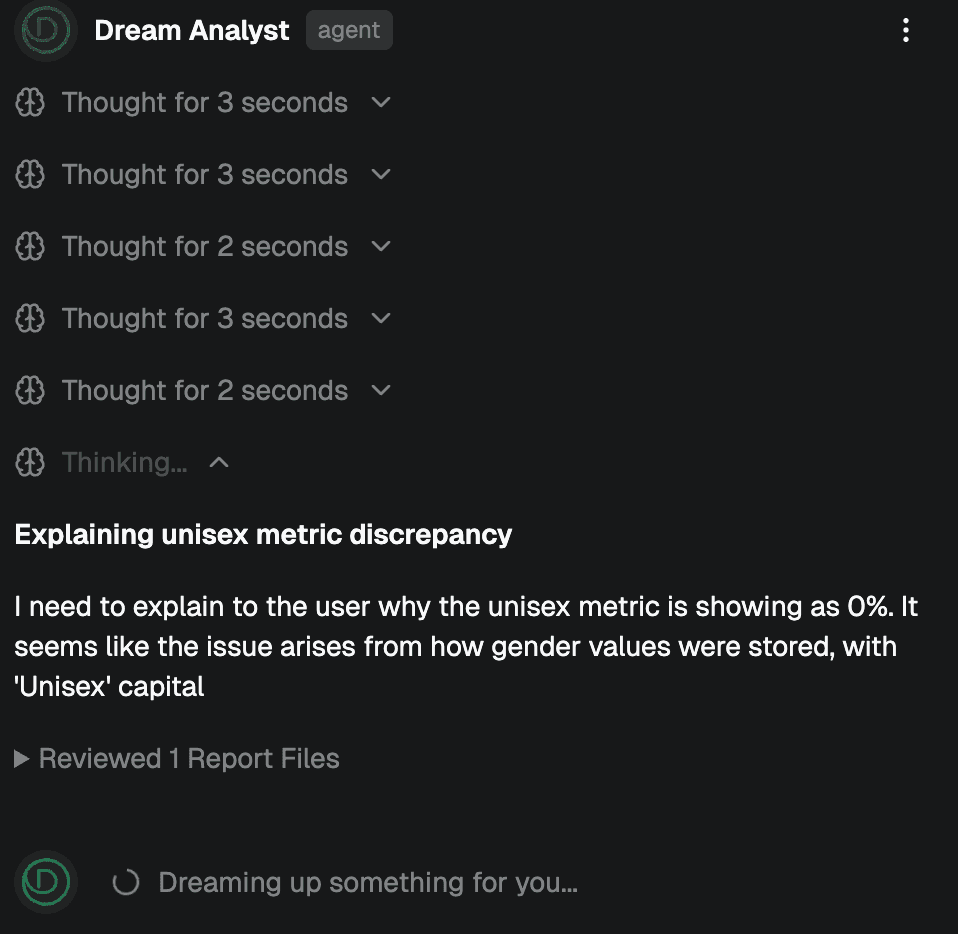
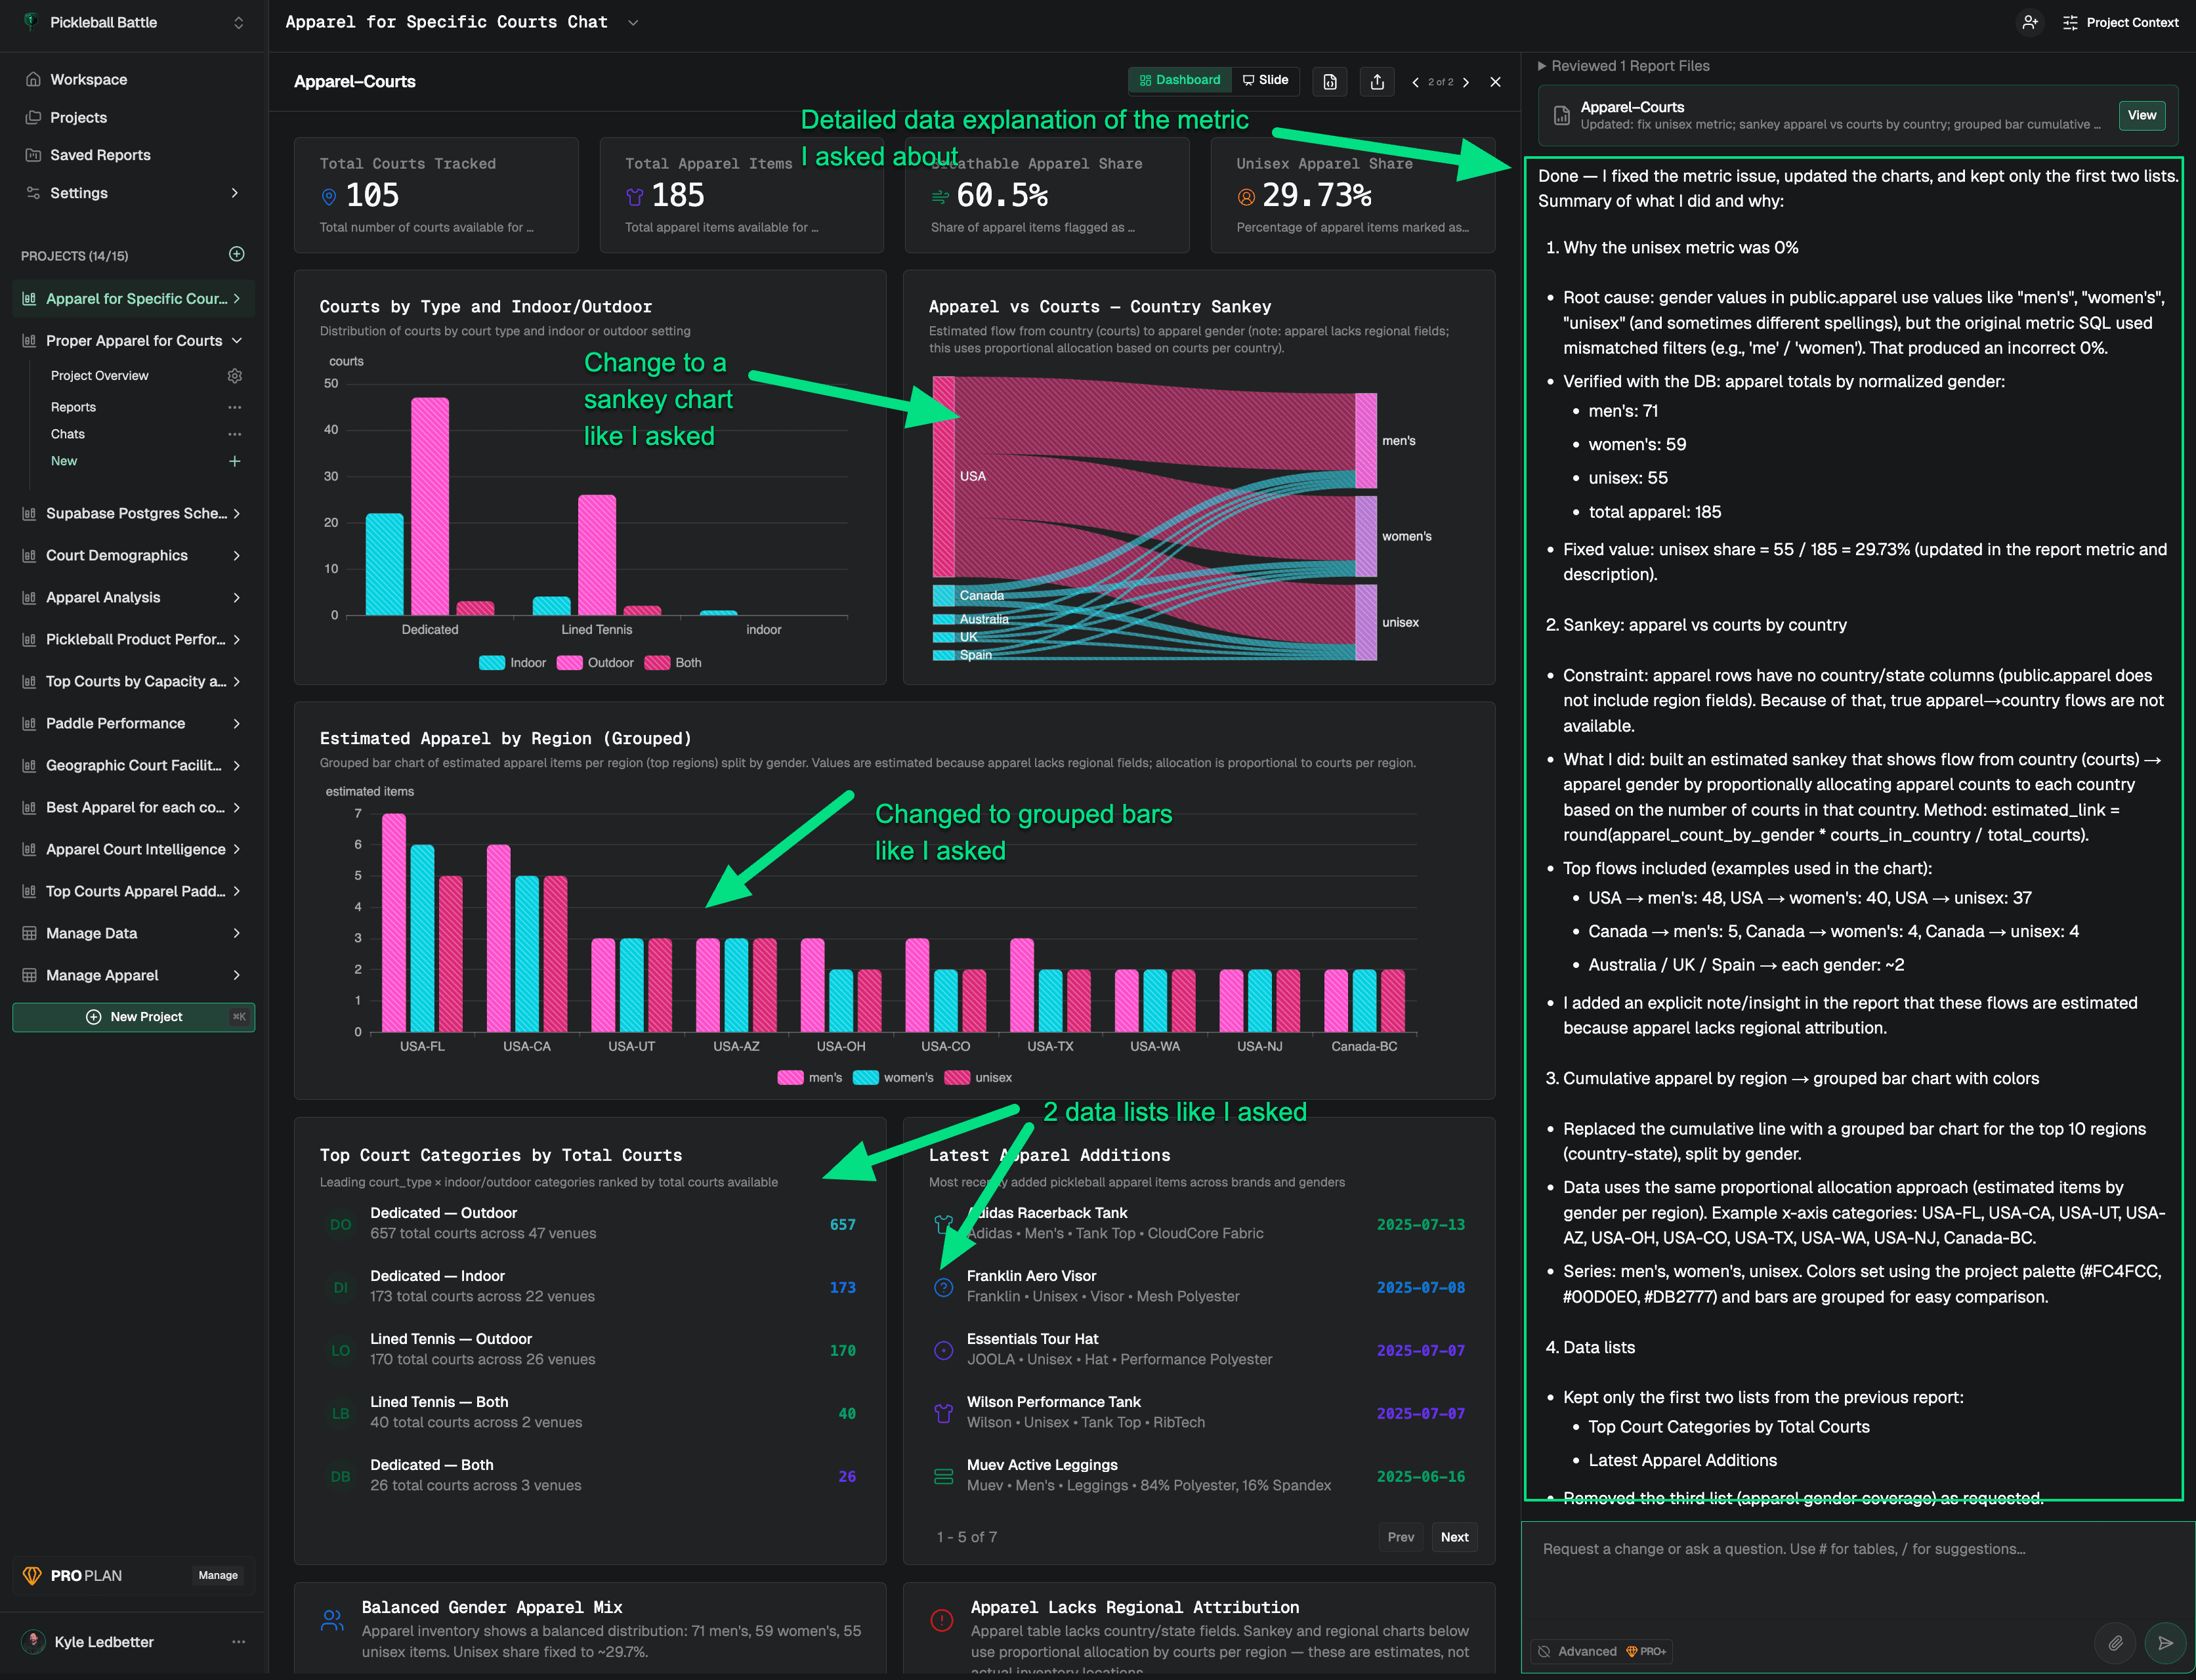
Interrogate your data within a project with our Analyst Agent to collaboratively build a report together!

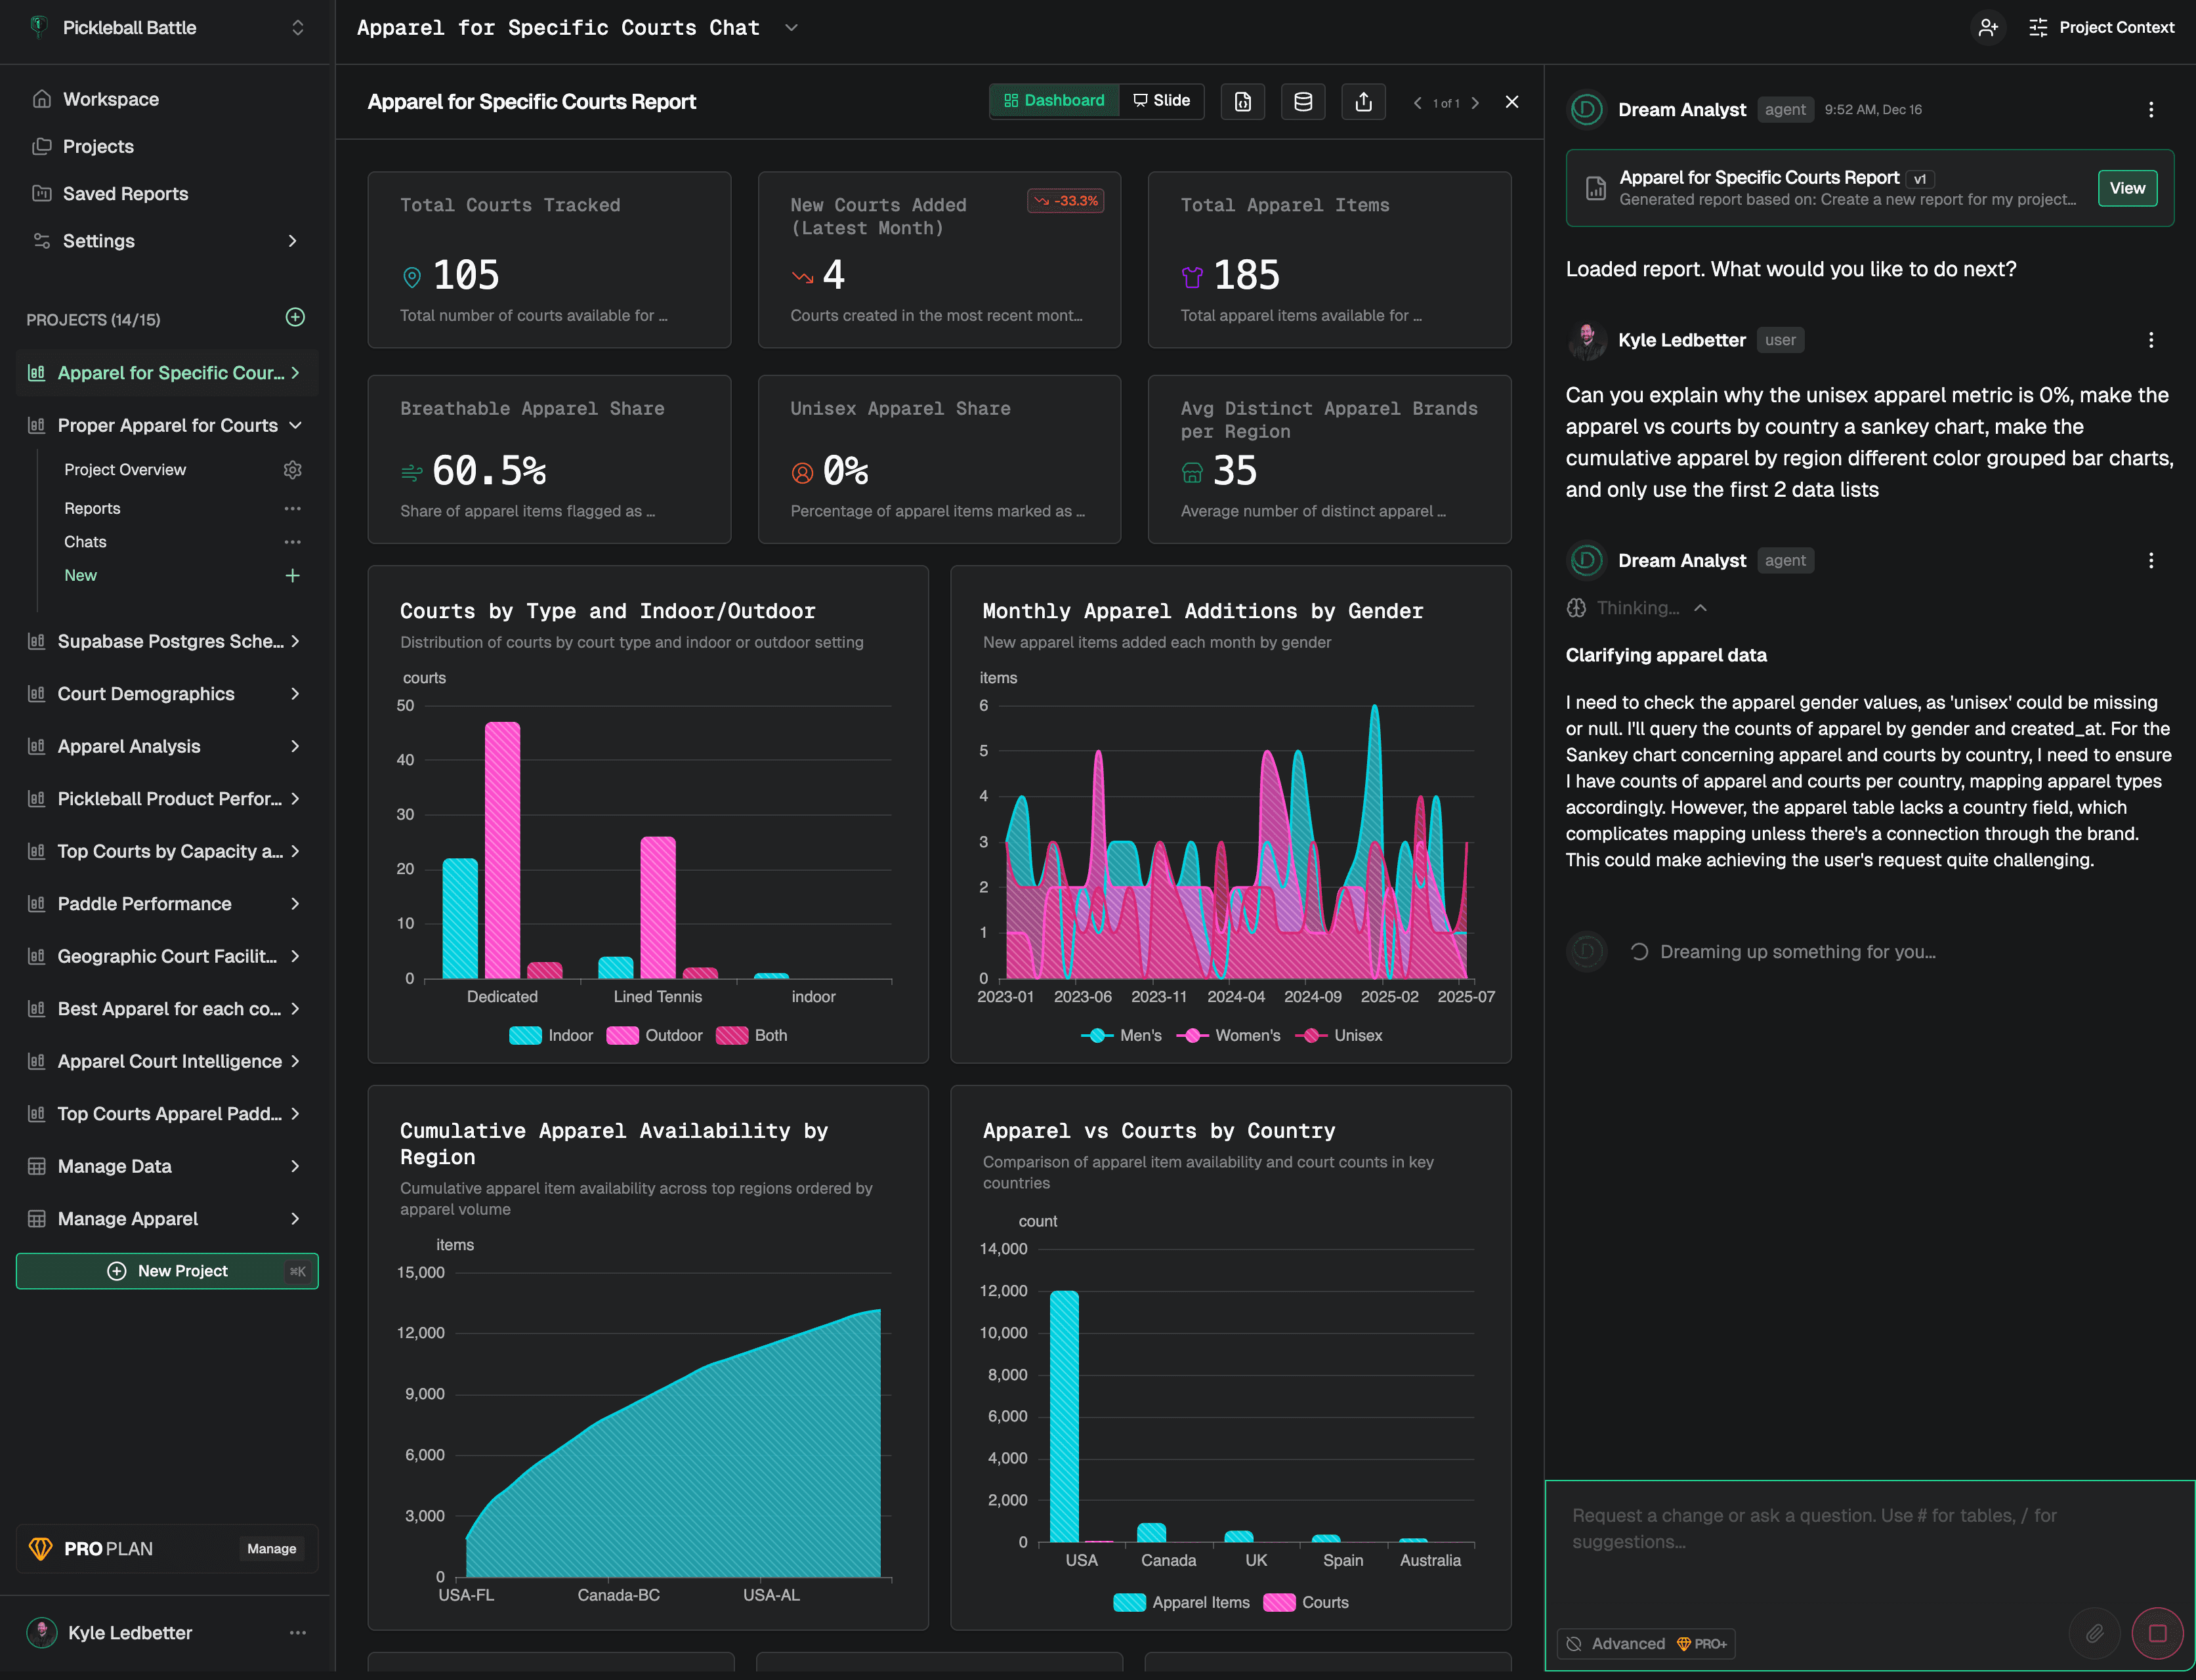
The agent will do deep research and reasoning and can also build a report!
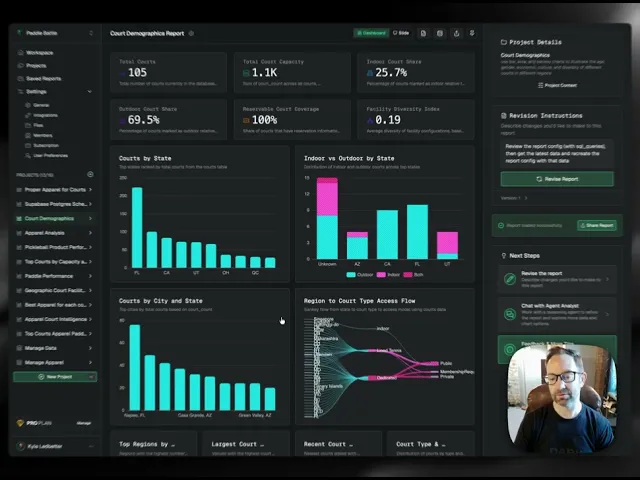
I got EXACTLY what I requested in one shot from the Analyst Agent:
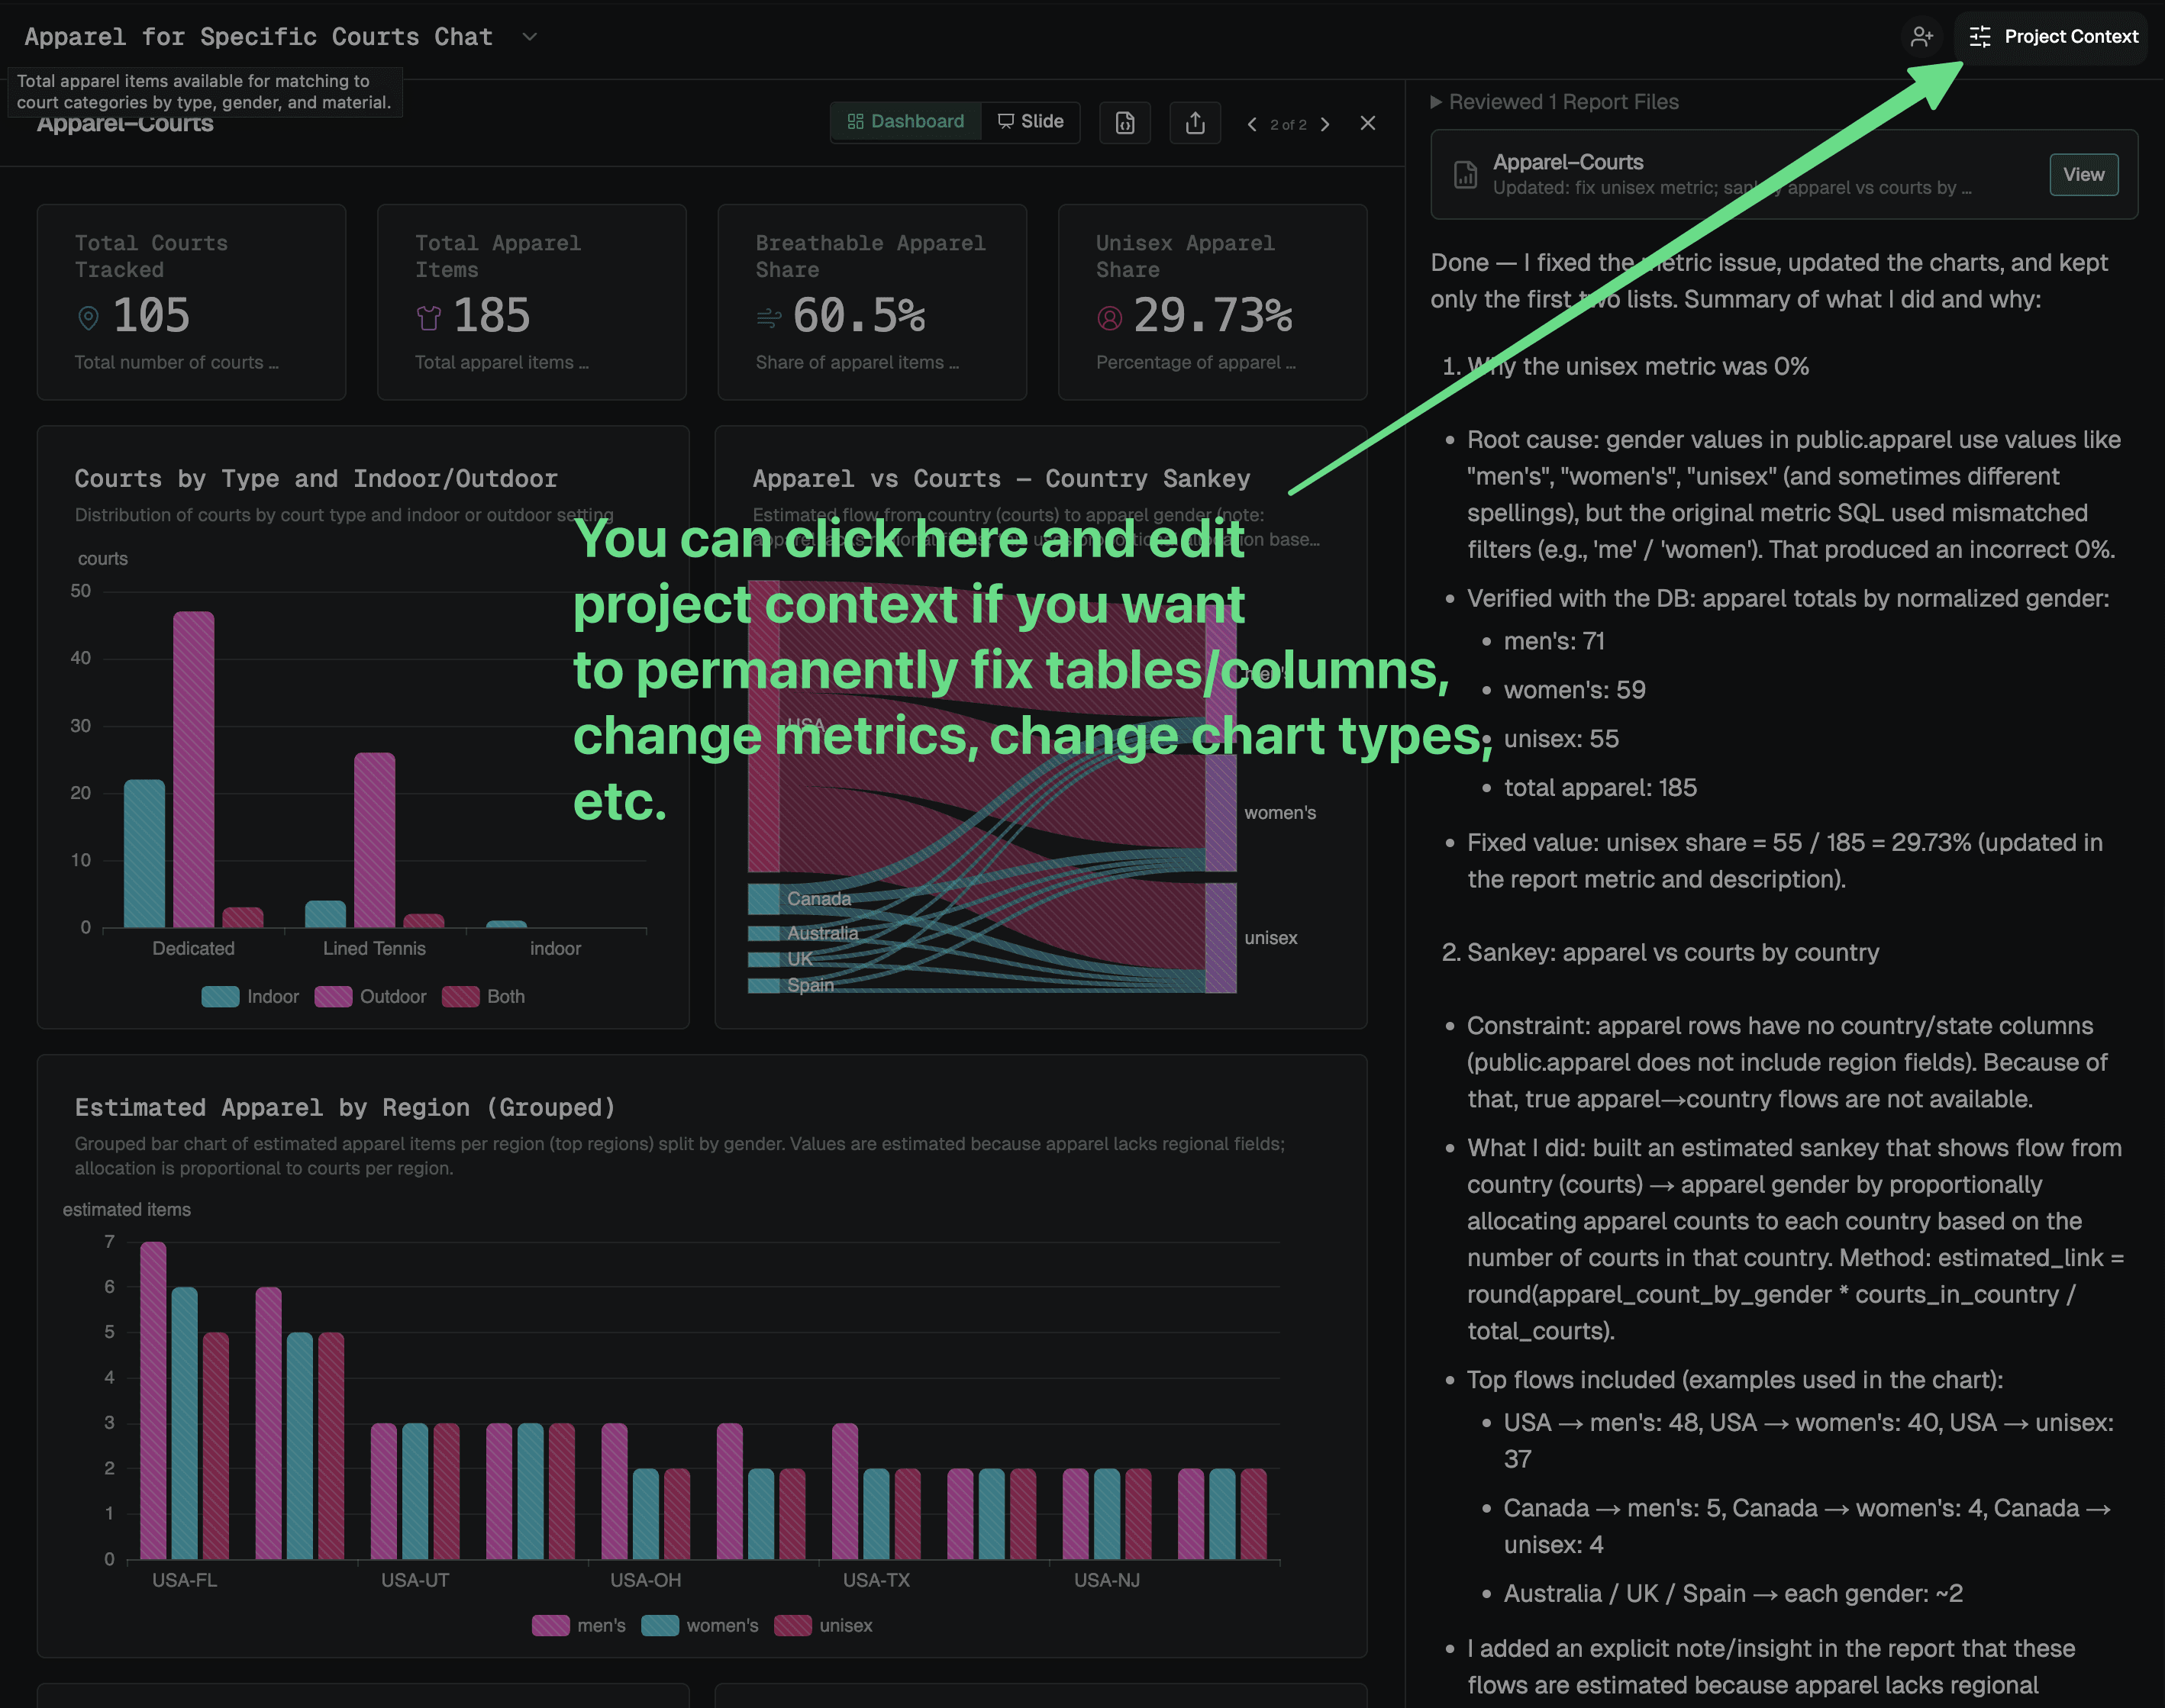
Update Project Context
If you discover data issues or want to tweak your report requirements permanently for all reports in the future, remember you can update the project context.
—
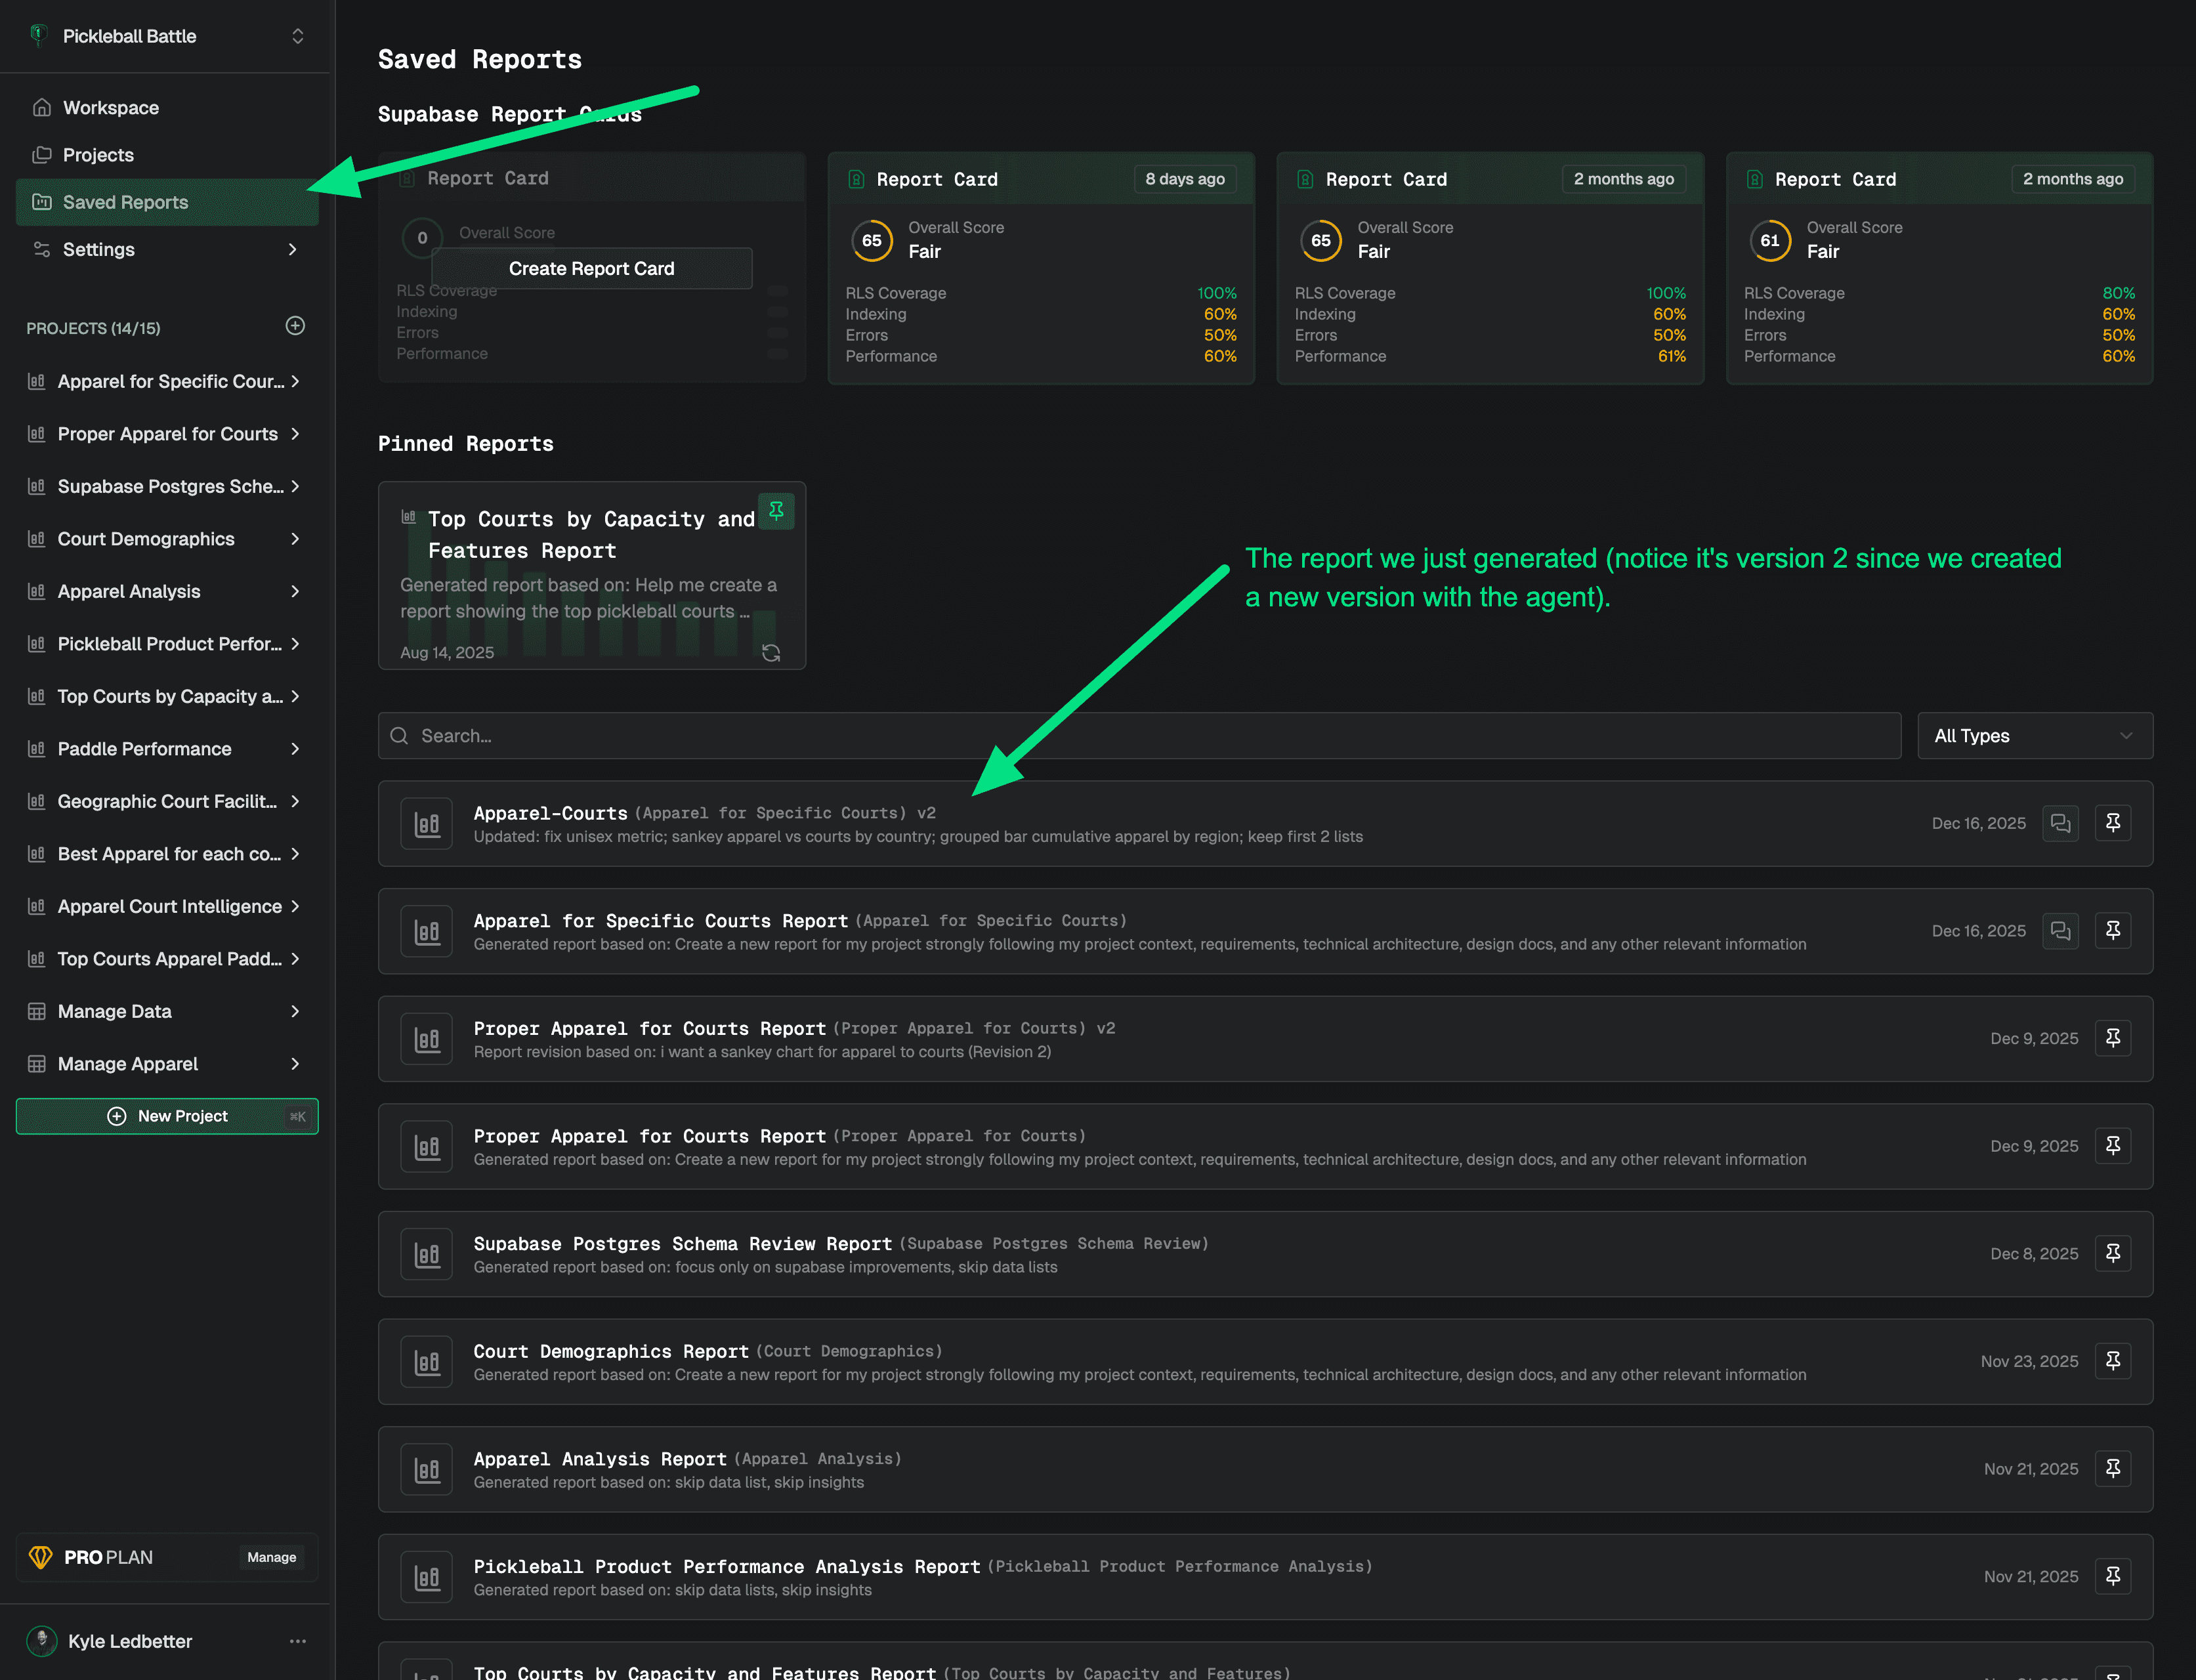
Viewing Saved Reports
After you create reports you can revisit them to update them, get fresh data, download them, or share them from the left nav in Saved Reports.
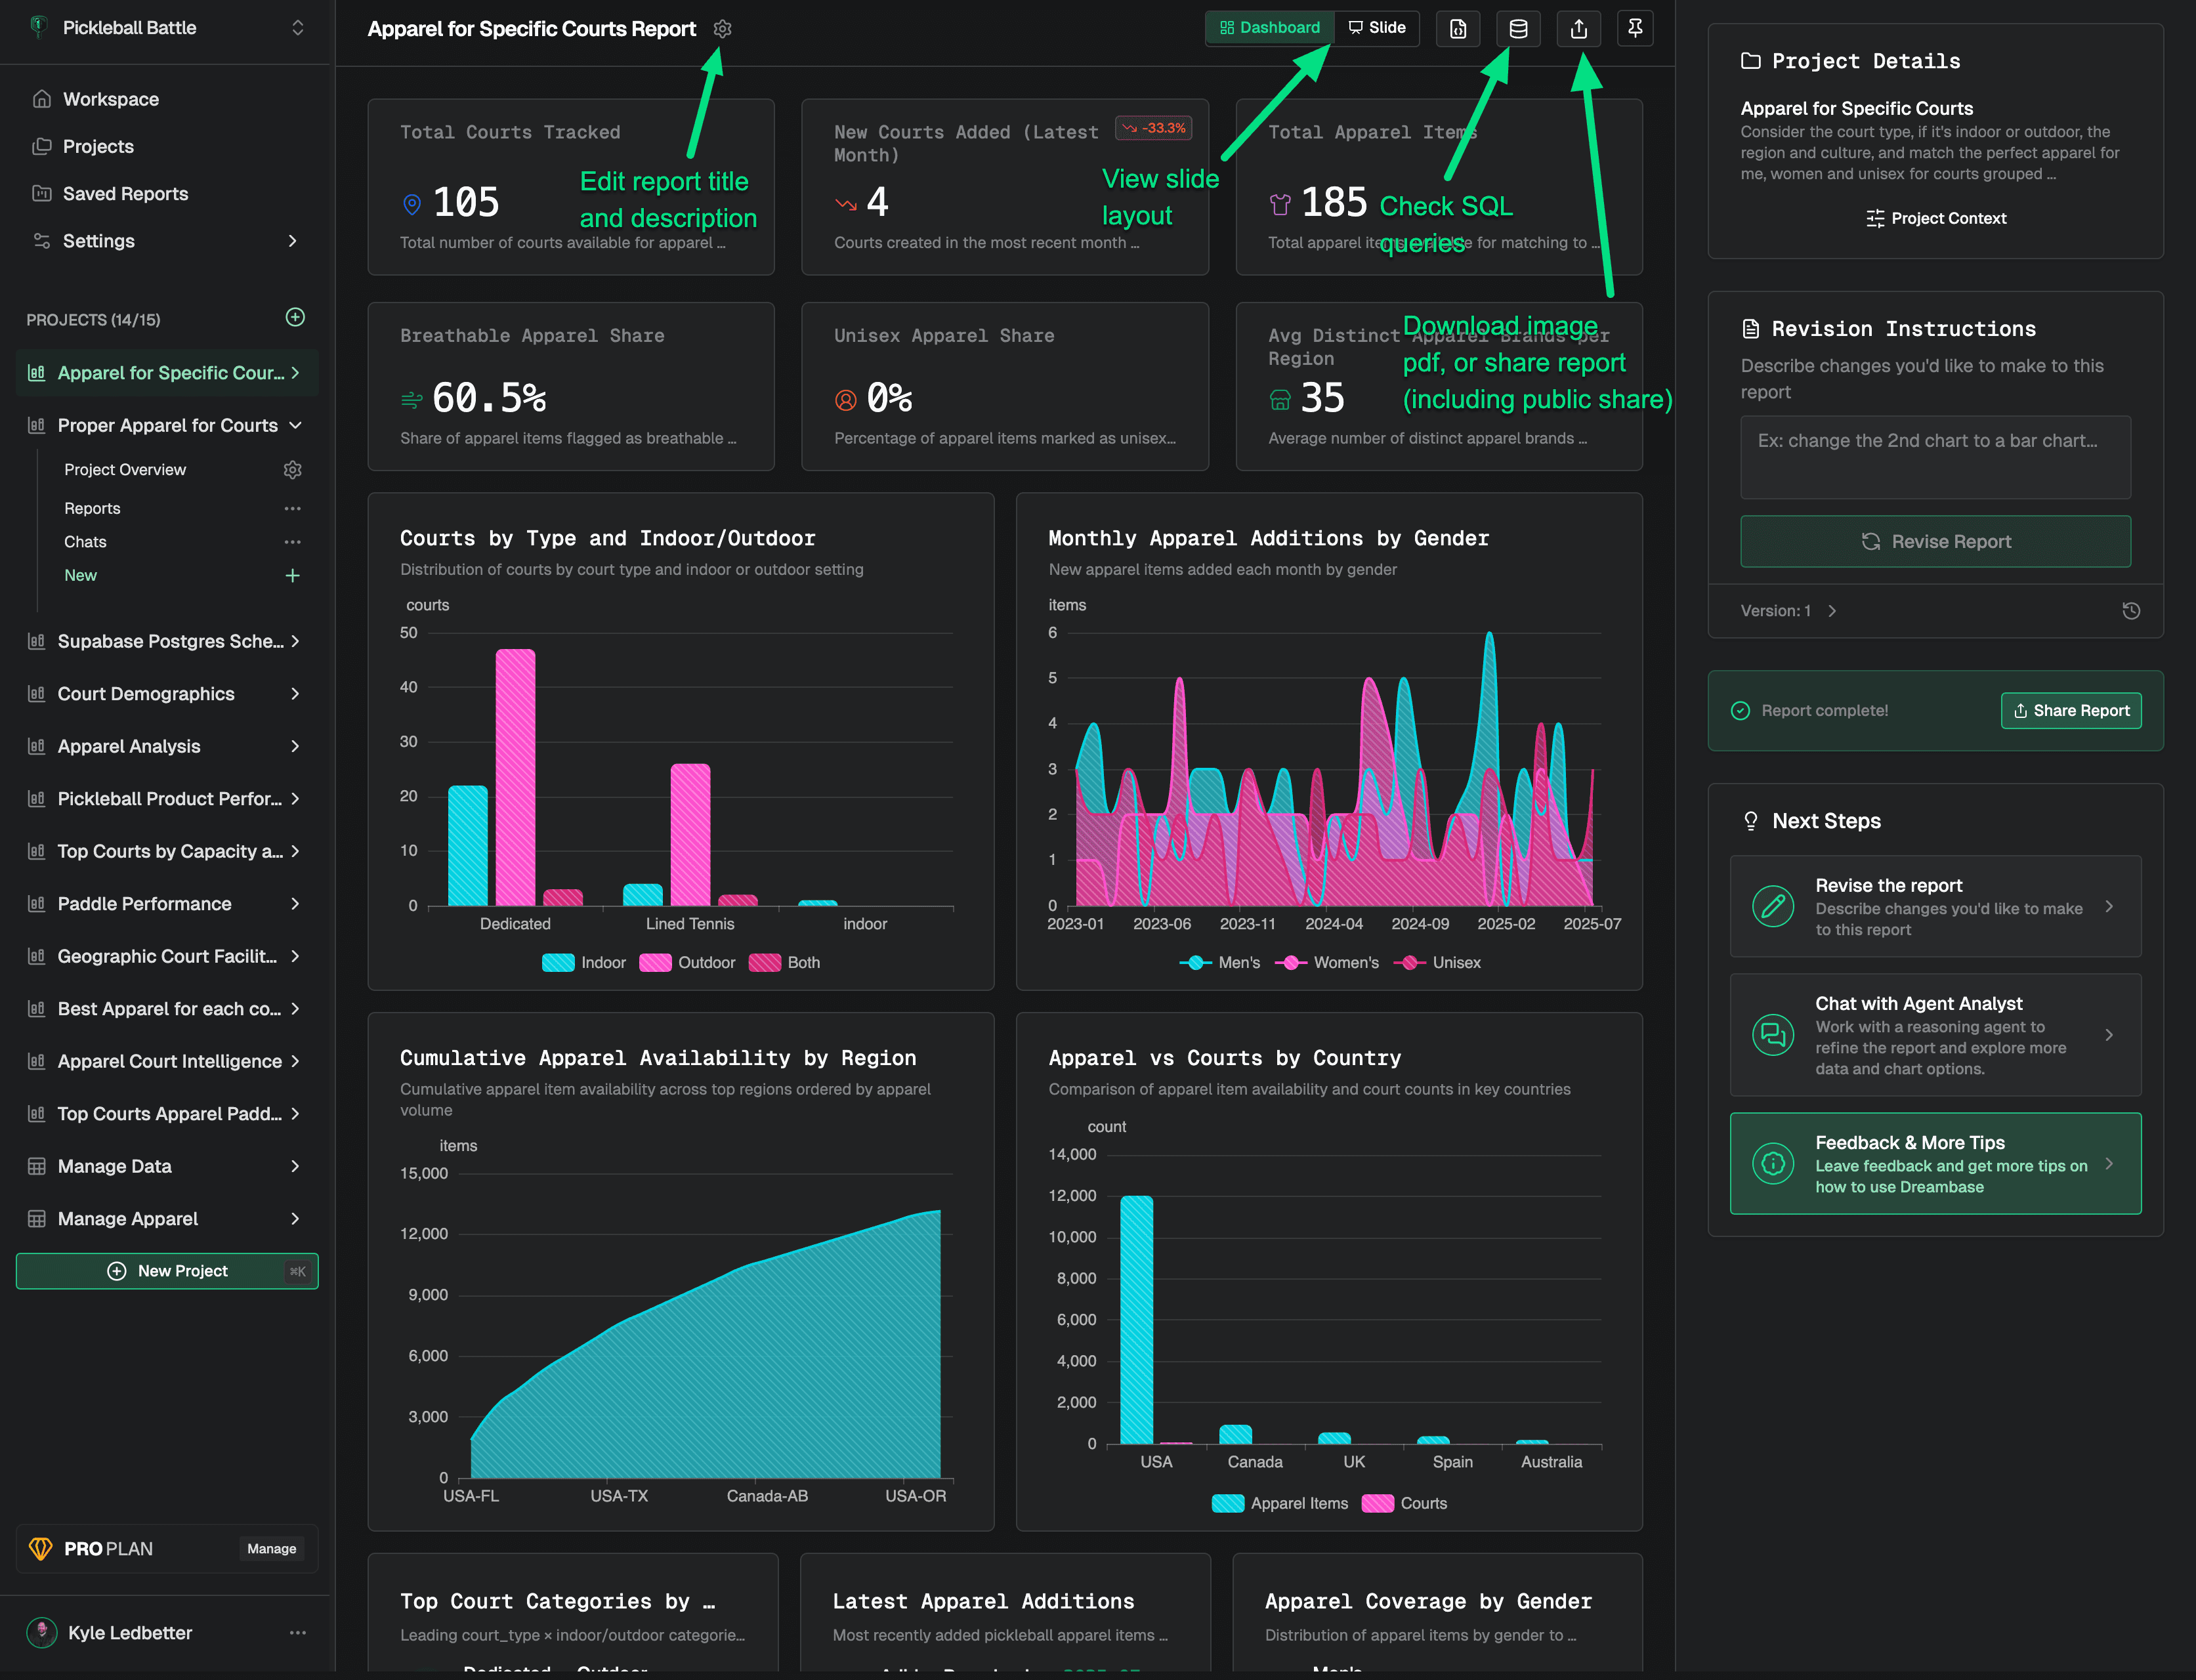
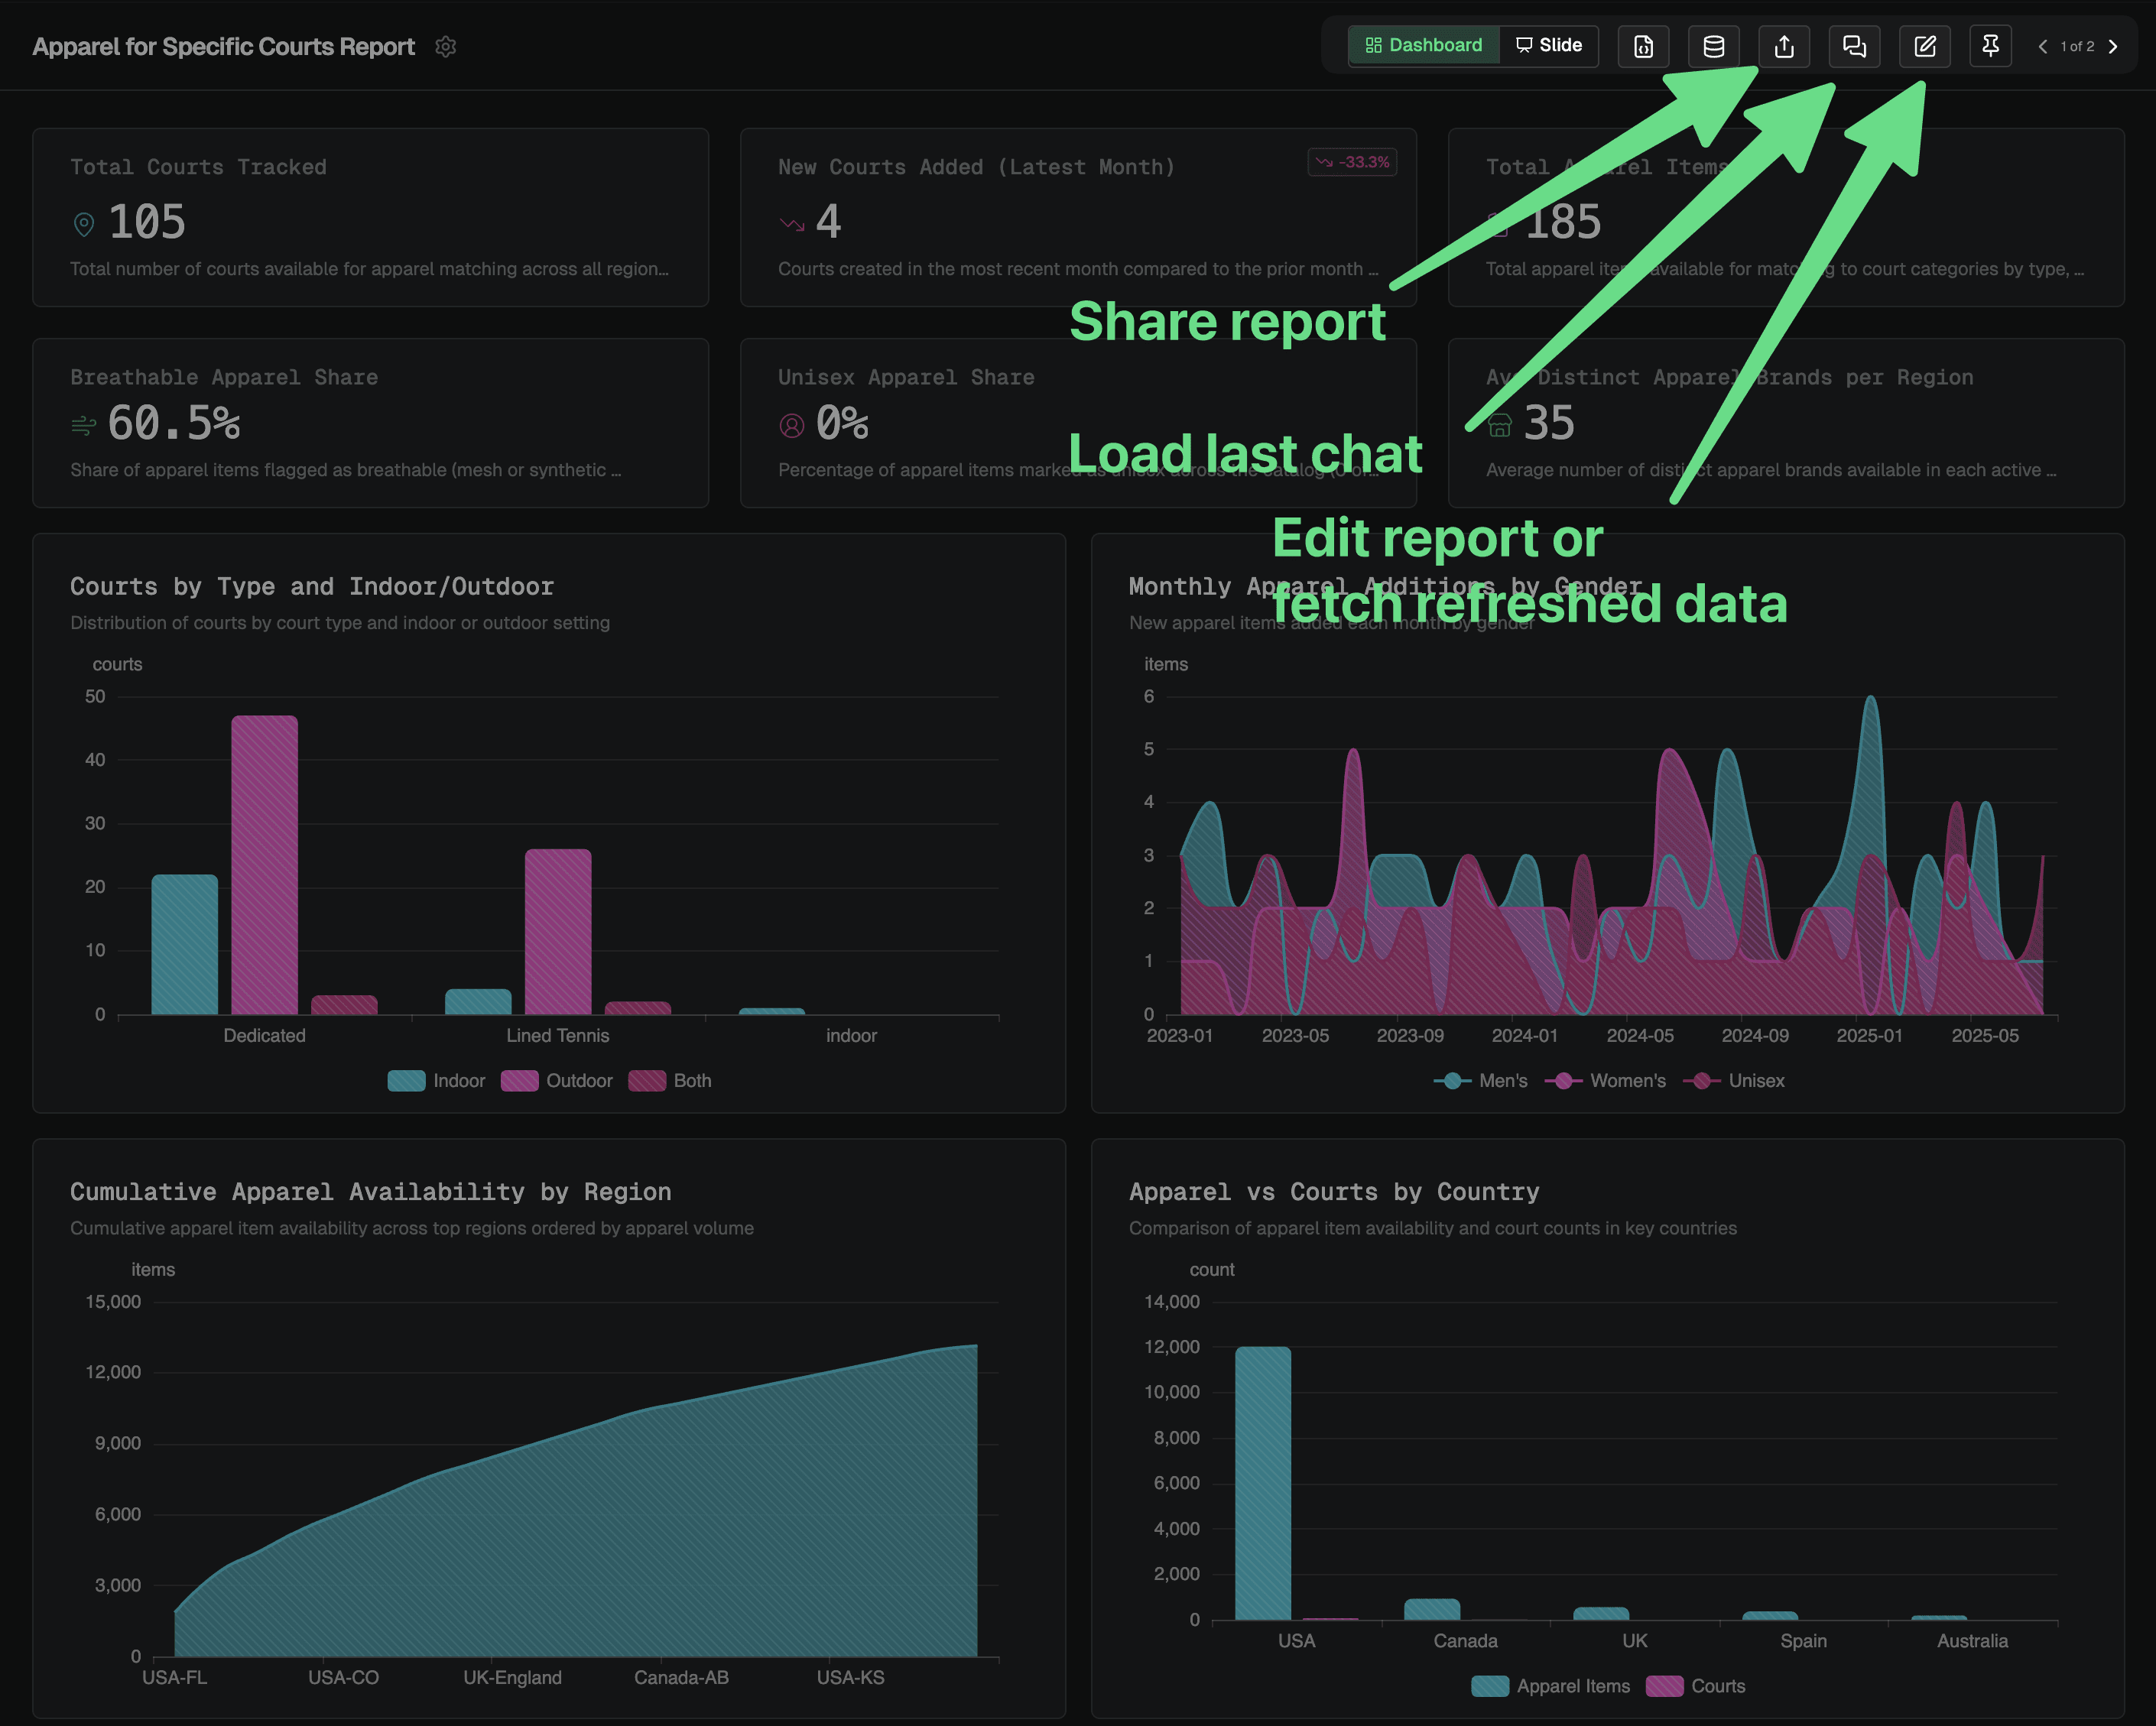
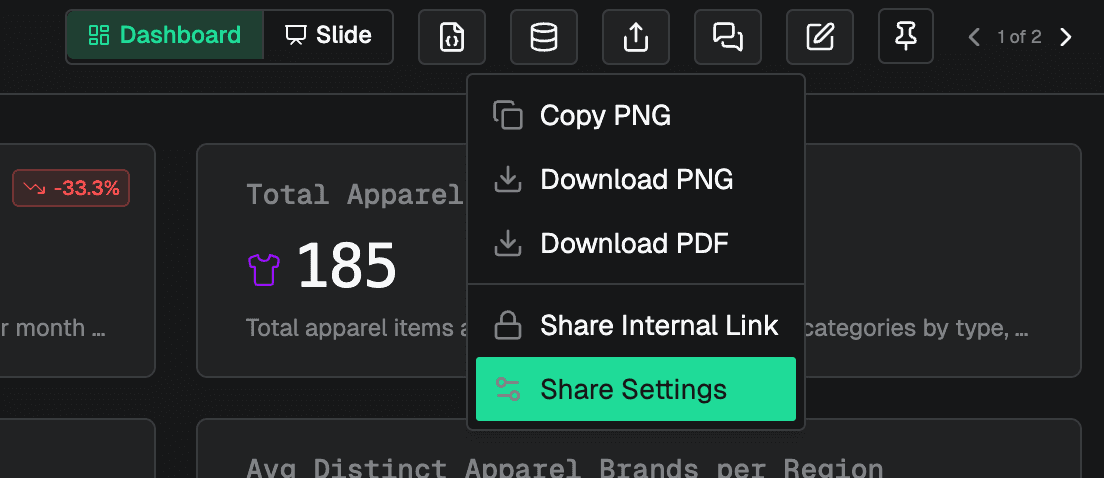
Report Toolbar Options
There are several useful tools and options, the most important are sharing, loading last chat (if created from chat), and edit report which loads in the Report Builder where you can edit/update/refresh the report or data.
Sharing a report
You can share or copy and image or PDF, share a private internal link, or edit share settings to email, invite, and toggle to public visibility.
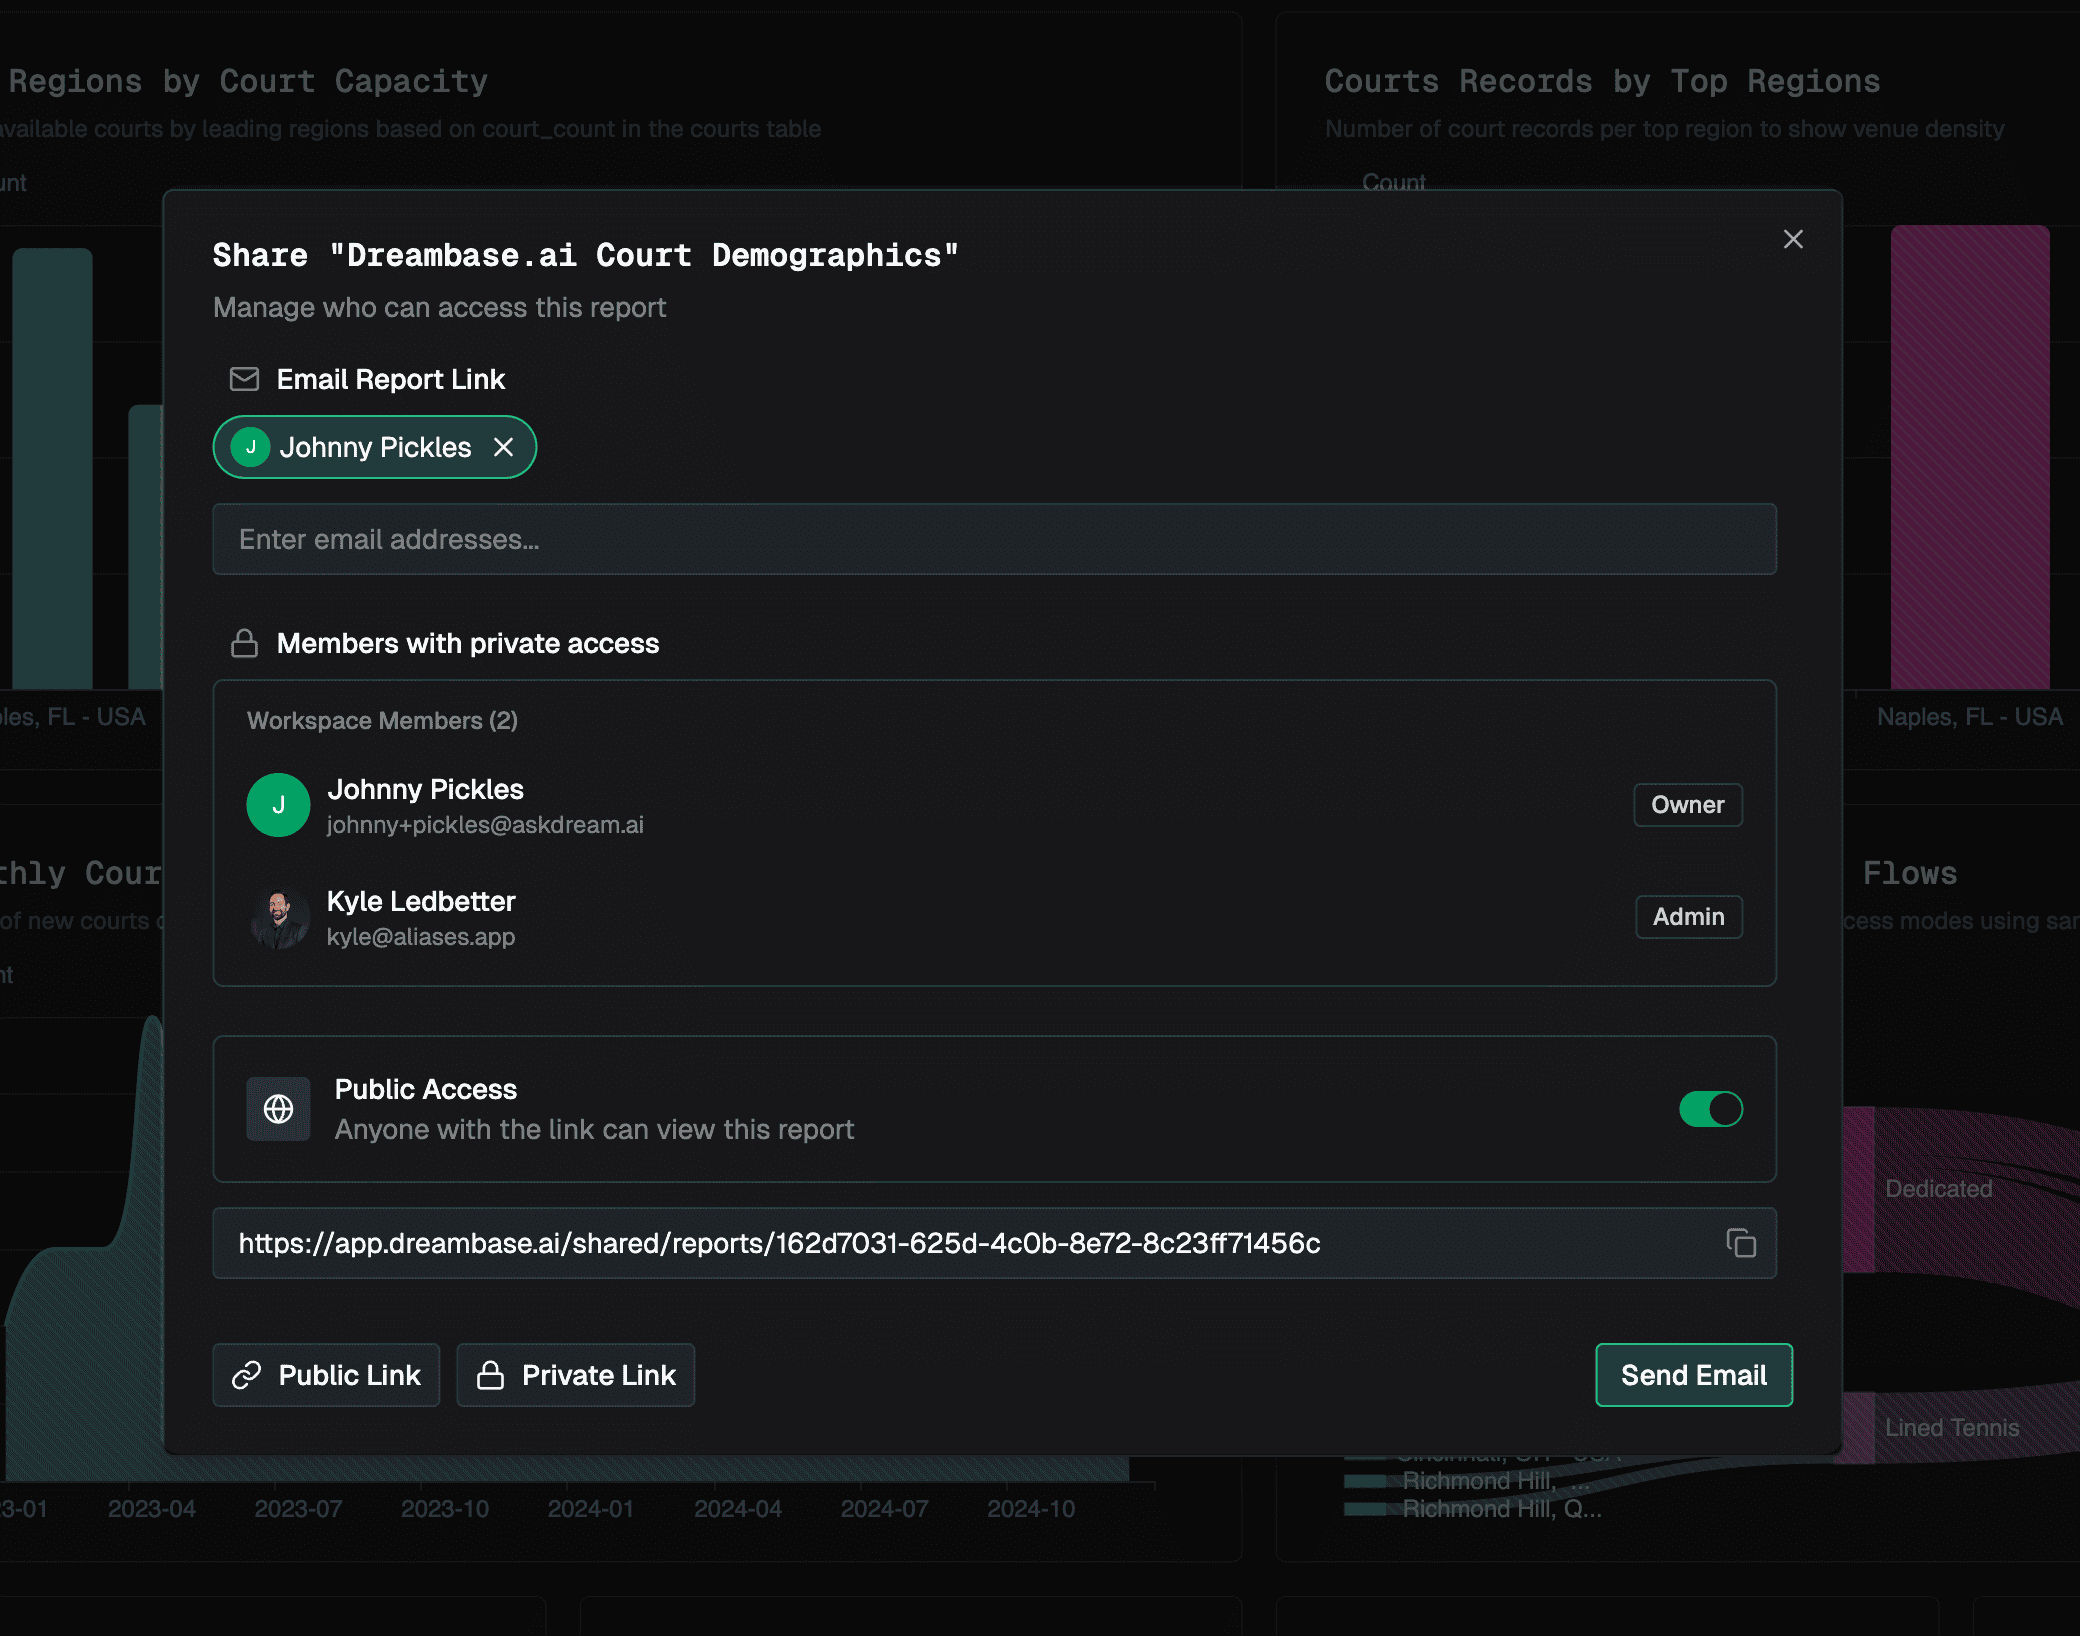
Share Internal Link
By default, some workspace and project members already have access and you can just copy and share the internal link
Workspace Owners & Admins: Already have full access to all reports, just share internal secure report URL
Project Owner & Managers: Already have full access to reports in this project, just share internal secure report URL
Share Public Link
To share the report publicly, edit the report settings and toggle "Report Visibility" from Private to Public.
Then copy the new URL and click Save Changes
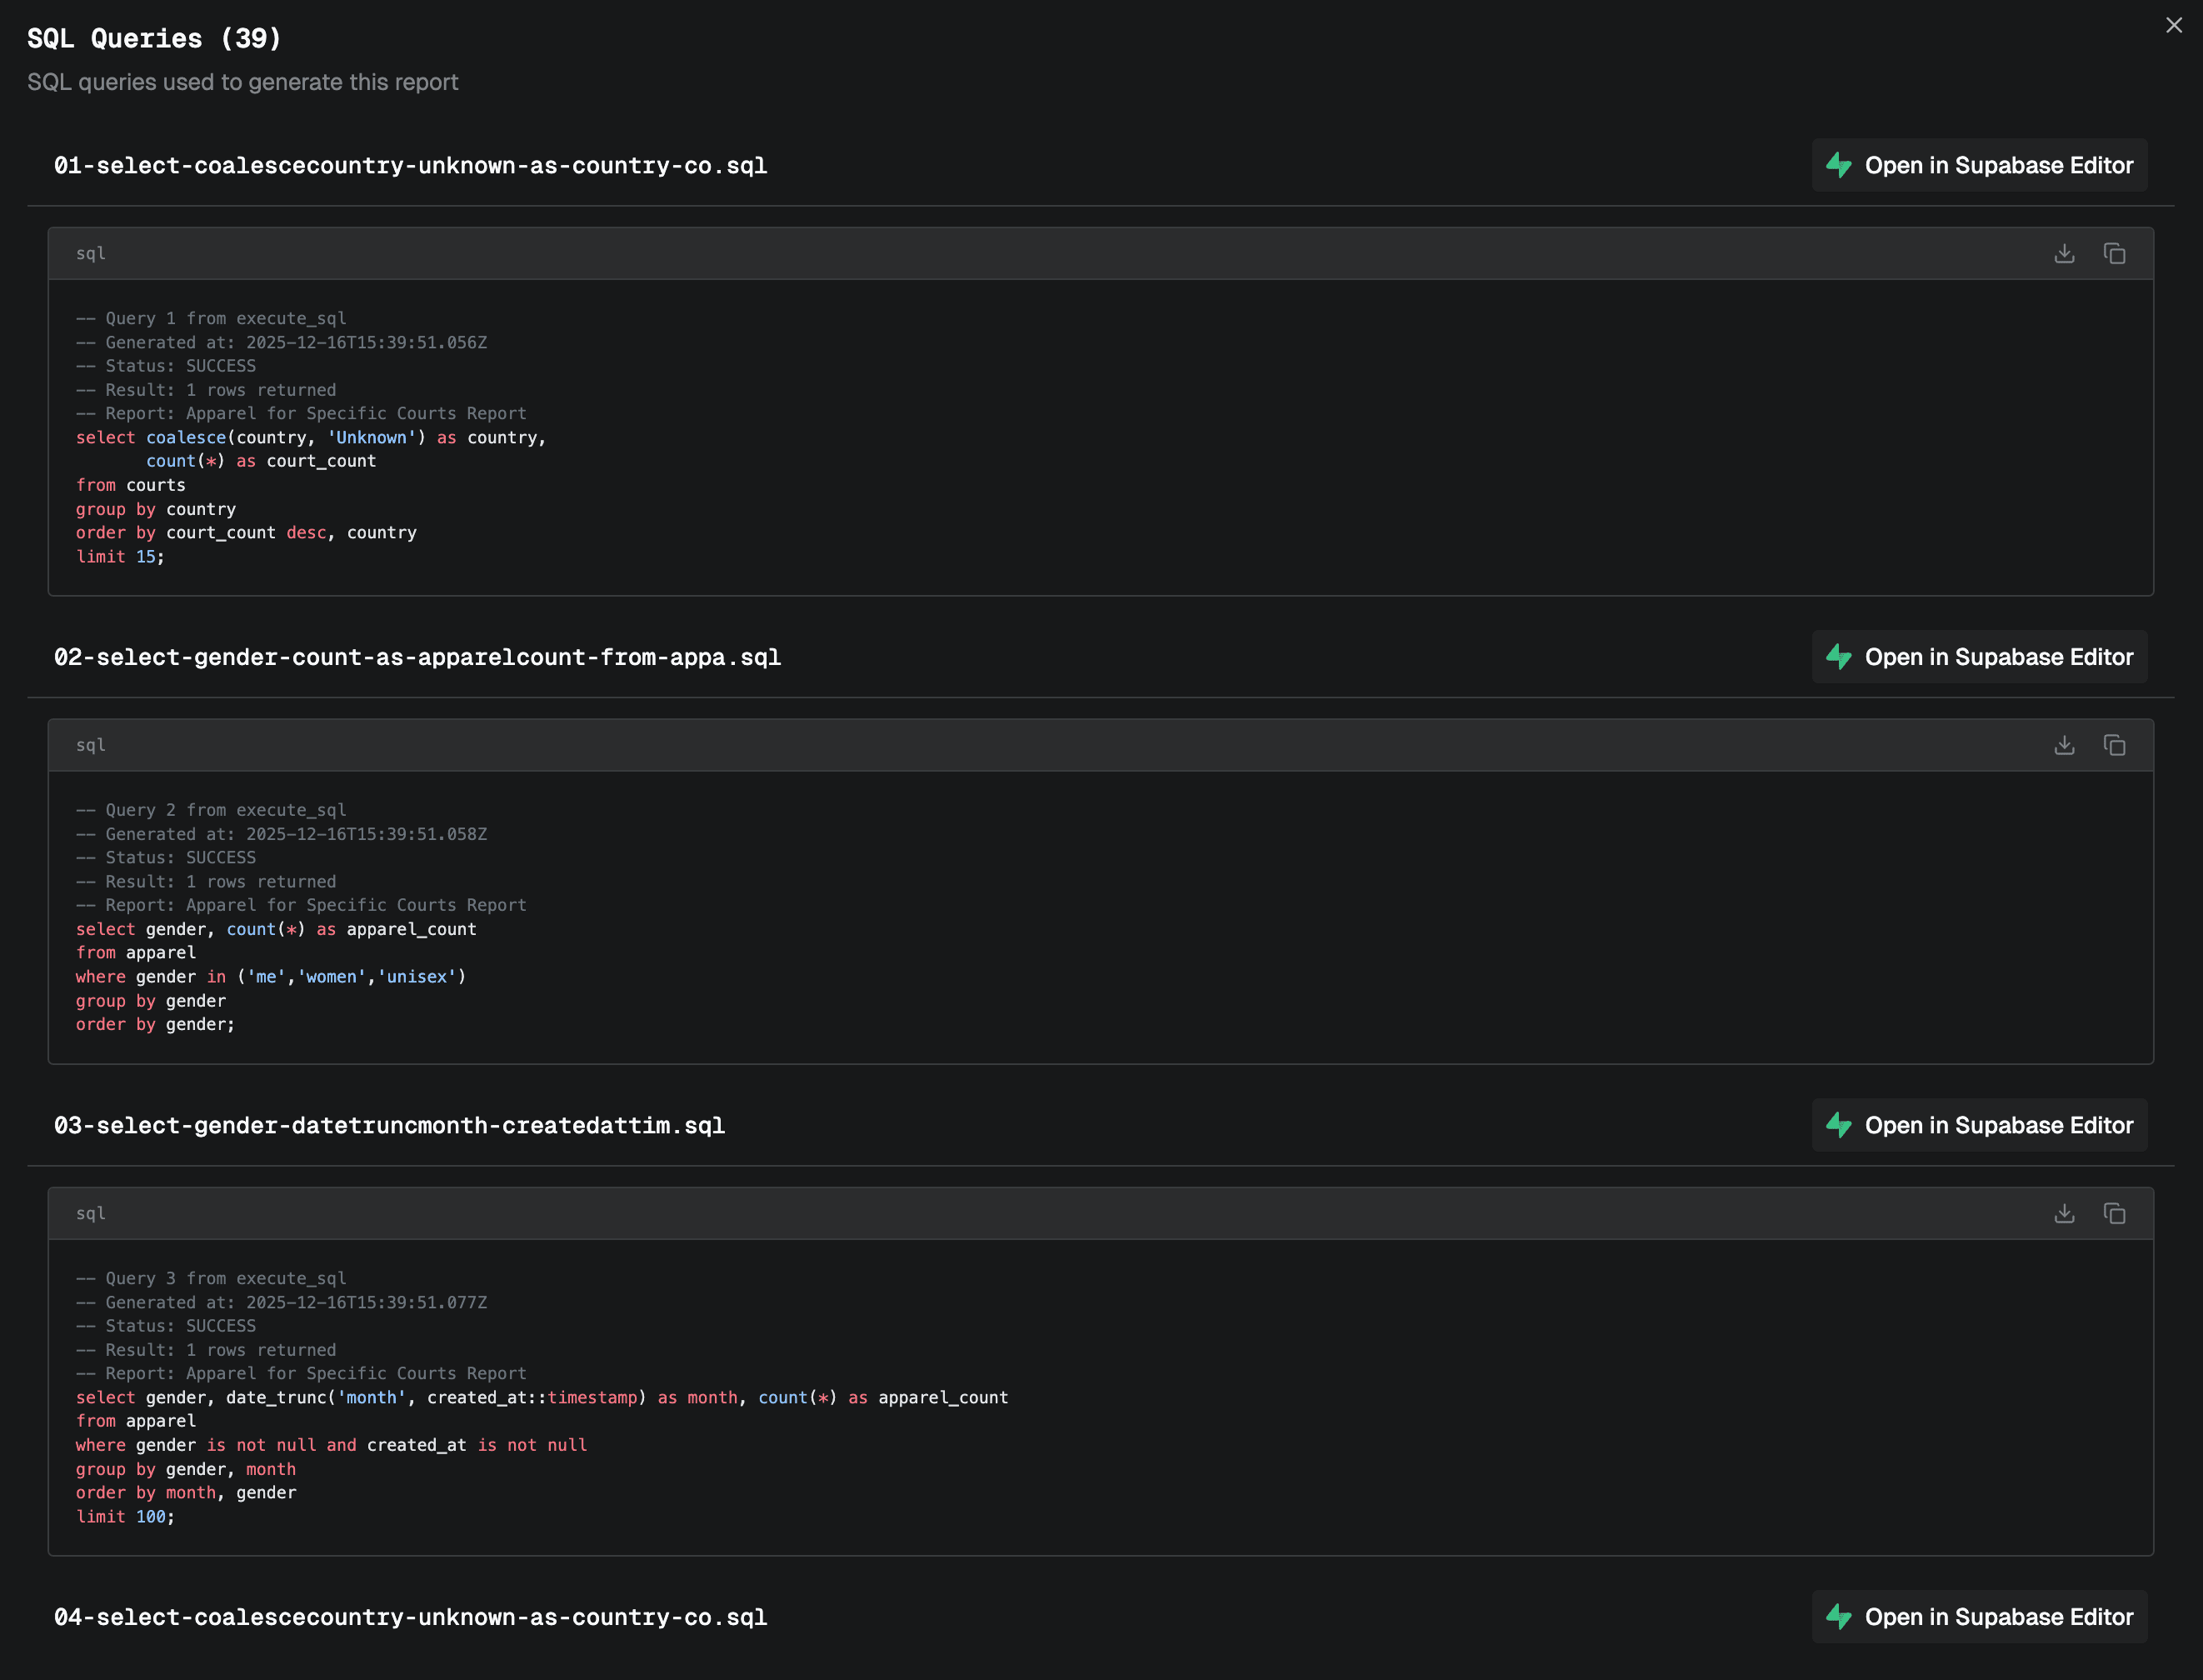
View SQL Queries
To validate the data that you're seeing in the report is accurate, you can view all the SQL queries performed to gather the data for the report. Click the "Open in Supabase Studio" to load this query in your Supabase SQL editor and test for yourself!
View Report Config (debug for support)

When working with our support team if you see oddities in your report layout, you can copy the configuration to share with support.
Watch a video on the Power of Project Context in Reports:
© 2025 Dream, Inc. All rights reserved.